Note: Creating Merge Templates on projects is restricted to project administrators.
Merge Templates are a powerful tool in ProjectTeam.com that allows you to create custom formatted outputs which can be used when users need to print data. Merge Templates are used to print a single record of a form.
Merge Templates can be created in two areas:
- Inside of projects by project administrators
- At the company level (outside of projects) by company administrators
This article covers how to create a Merge Template on a project.
By default, newly created Merge Templates are only available to users from your company that have access to the project. However, after creating your Merge Template you can make it "Public" which allows users external to your company to print to it.
Prepare your Merge Template file
Preparing your file is the most important step of creating a Merge Template and needs to be done outside of ProjectTeam.com. Your file can be created in one of the following four external applications:
- Microsoft Word (Most recommended and used in the example below)
- Microsoft Excel
- Microsoft PowerPoint
- Adobe PDF
There is no limit to the number of variations you can make to your Merge Template file. In most cases, you may already have files that are your company standards which you can use as the starting point for your template.
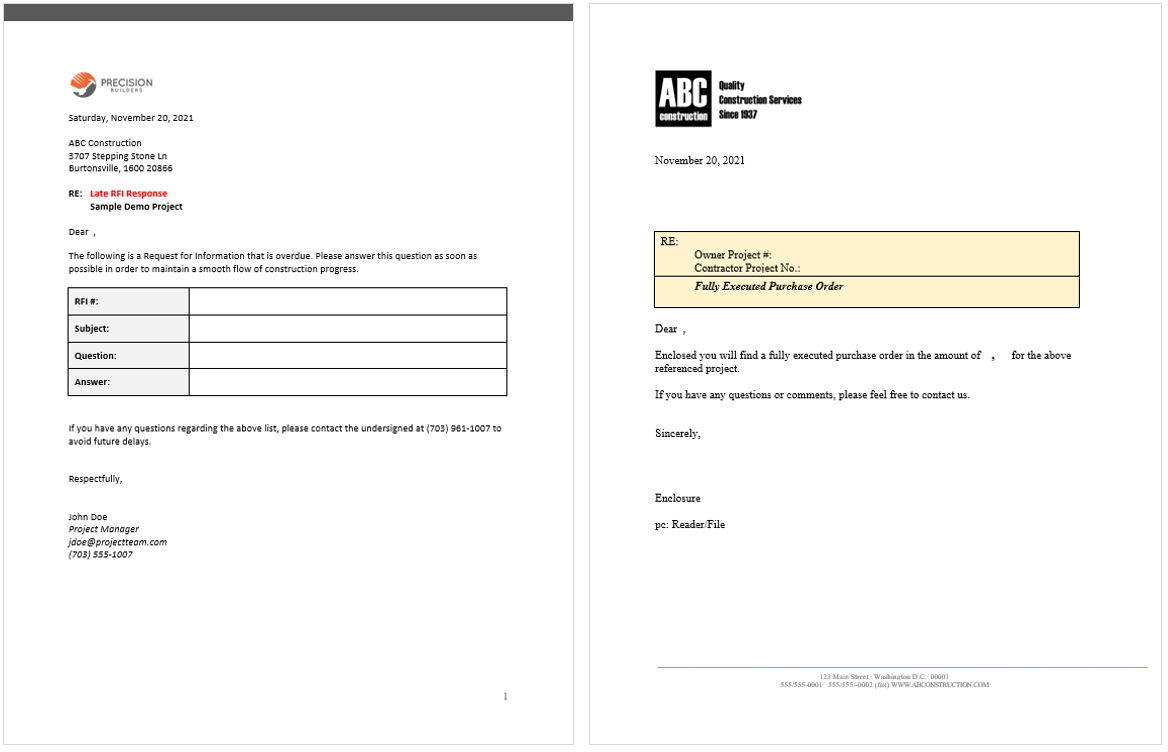
As you prepare your file, make sure to leave space in areas that will eventually be populated by form field data. Below are two examples of prepared files (notice in the first example we added a table to help organize the field data):
Create a project Merge Template
- Inside of a project, make sure you are on the Home option of the secondary navigation.
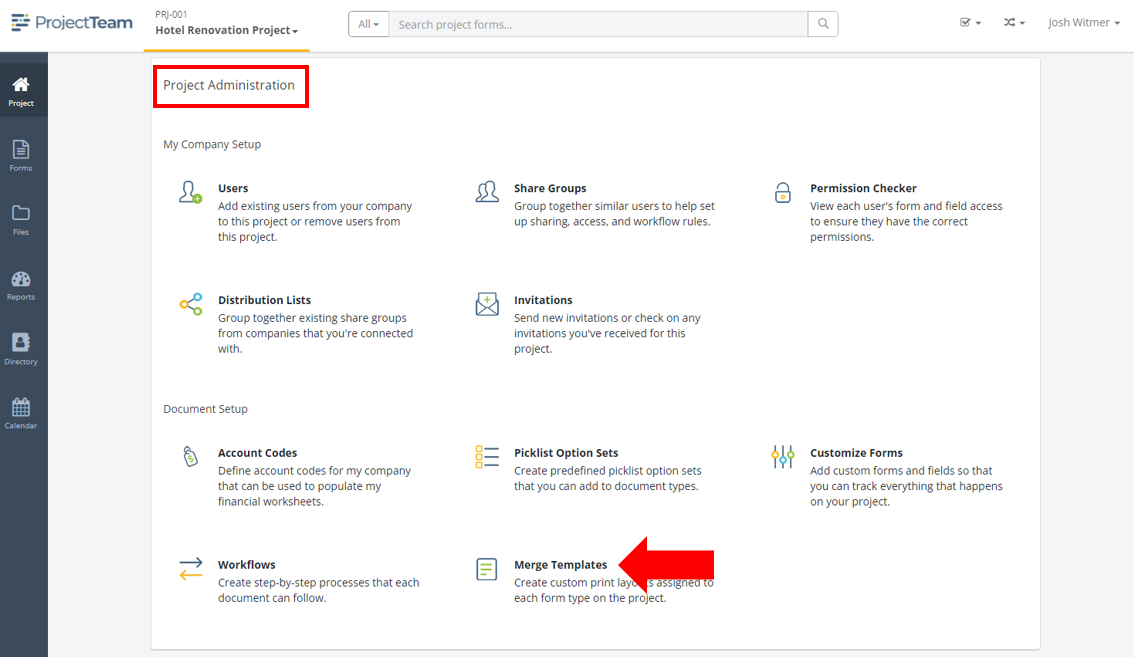
- Scroll down to the Project Administration panel.
- Click the Merge Templates option inside of the Project Administration panel.
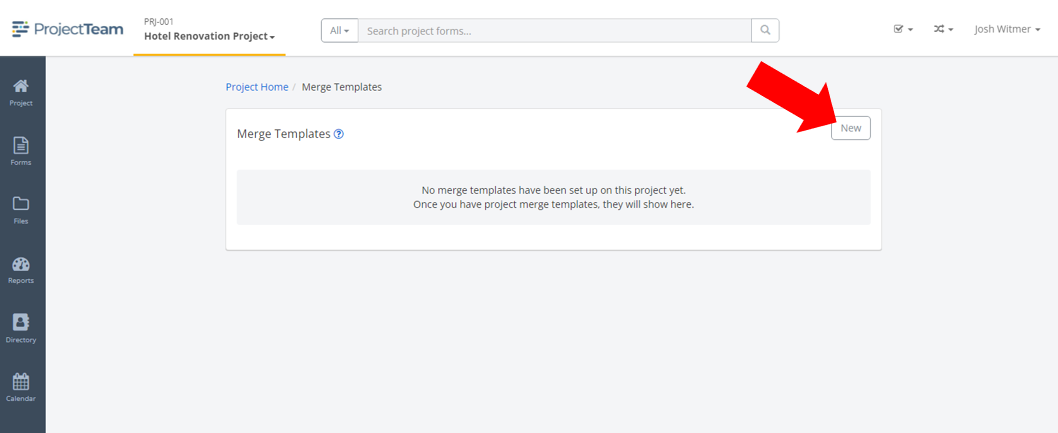
- View the list of existing Merge Templates created on your project.
- At the top of the Merge Templates list, click the New button.
- A New Merge Template modal window opens with three steps.
- In step one, enter the required fields including:
- Merge Template Name
- Source Form Type (Choose the form type that will be used when users print to your Merge Template. For example, if you are creating a Merge Template that should be used when users print a change order, choose change order as the source form type.)
- Click the Next button on step one.
- In step two, copy and paste the appropriate merge tags into your prepared file one tag at a time. You will see a dropdown at the top of the modal window that allows you to filter by the location of the merge fields. You will see four options:
- Document fields - Tags related to fields of your form (Ex. Subject)
- User fields - Tags related to the user at the time of print (Ex. First Name)
- Project Fields - Tags related to the project (Ex. Project Number)
- Prompt Fields - Tags related to prompts (Ex. Add photo)
Your file should include all of the tags you intend to be filled by the merge process when users print to the Merge Template. Below are the two examples used previously, with the tags highlighted in yellow: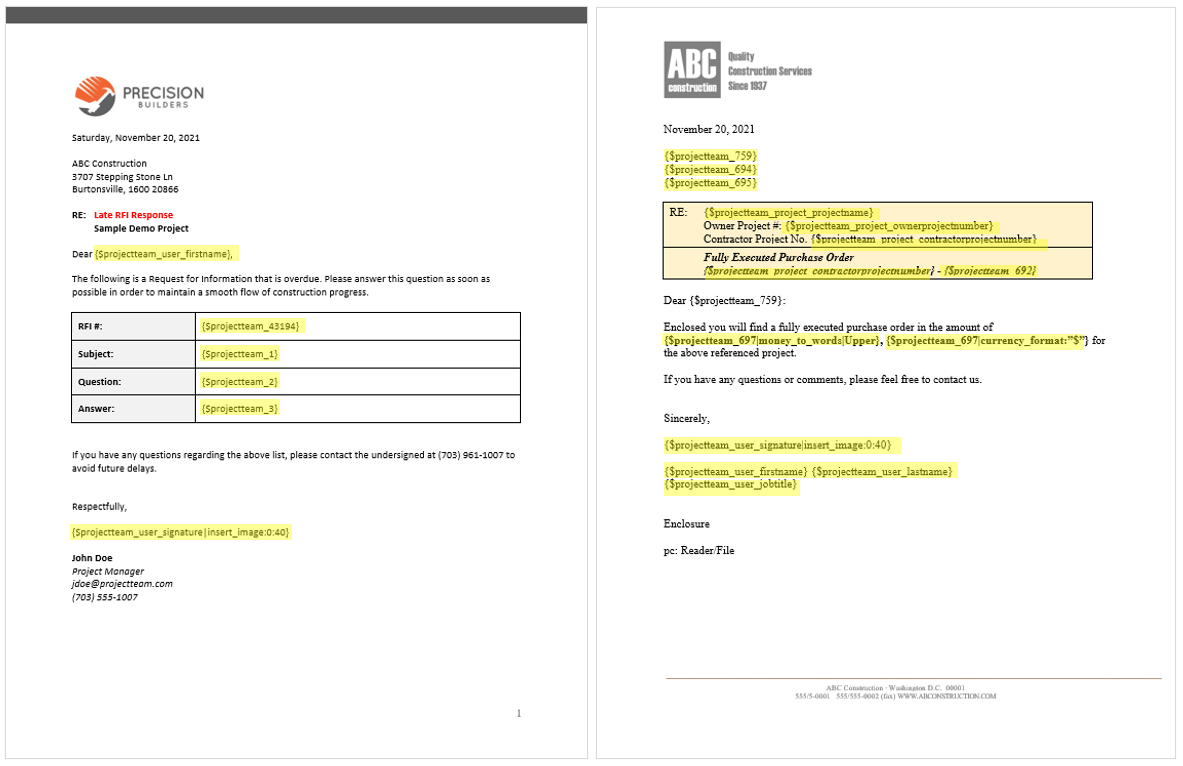
- Save your file after you add all of the appropriate tags.
- Click the Next button on step two.
- In step three, click the Upload button, navigate to your prepared file, and then click the Open button. You should see the uploaded file listed in the modal window.
- Click the Finish button on step three.
- You are taken to the Merge Template properties view. Your Merge Template has been successfully created and is ready to be used when printing by users from your company on the project.