Quick Navigation:
Sharing information is at the heart of ProjectTeam.com. When you create a new form, by default you are the only user that has access to that form. That way, you can create forms and keep them private until you're ready to share.
You can share forms with users that are connected to your project or share with any email address. Once information is shared, it can no longer be deleted. That way you never have to worry about forms being lost or deleted.
On the top of every form in ProjectTeam.com, you'll see a Share button available. Clicking the Share button brings up a window that has two tabs. The first tab shows all existing Share Groups and Users that you're company is currently connected to on the project. The second tab allows you to share to any email address so that you can share information with non-users.
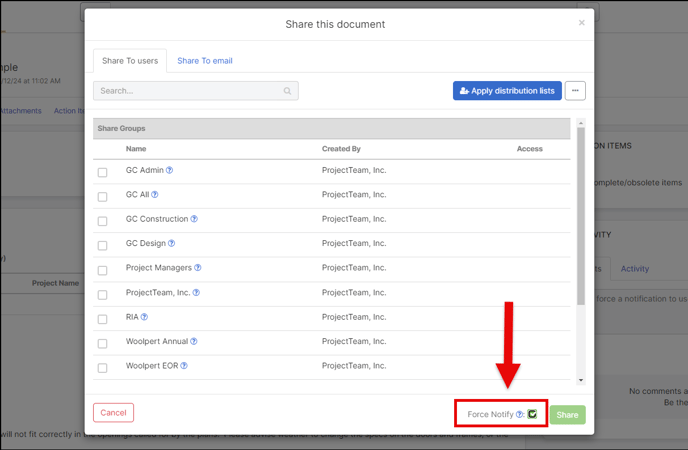
In the share window under the "Share to users" tab, you'll see a list that shows all Share Groups and Users that your company is connected with on the project. You can search and sort the list to find the groups or users quickly.
You can share with:
-
Users from your company that have been added to the project
-
Users from other companies that have access to the project
-
Share Groups that have been created in the project
Check the box next to each Share Group or User you want to share the form with, then click the Share button. The selected Share Groups and Users will now have access to the form.
Once shared, you will see the user's face or initials in the Share panel at the top of your form. This provides a quick visual to let you know how many other users currently have access to the form.
When performing a share, email notifications may be sent to users depending on their share preferences (defined on the My Page). If you are sharing a package document type, such as a Drawing Package, the receiver will only get one notification for the package. They will not receive individual emails for items contained in the package, even though the items are auto-shared in that case.
As you create and share information in ProjectTeam.com, you may also want to collaborate with other users on that information. Even though users can set their email preferences, in cases where you want to override their preference and force an email notification, you can click the Force Notify checkbox.
You can select the Share Groups or Users you want to force a notification to, check the box, then click the Share button. This will drive an email notification to the users selected.
Note: The Force Notify option works only for NEW shares for your form. Users will not receive an email notification if they already have access to the form even if that access is through a Share Group.
For example, if you have a Share Group called "Project Managers" and a user is in that group and that group has been previously shared the form, selecting that user and doing a Force Notify will NOT send a new notification.
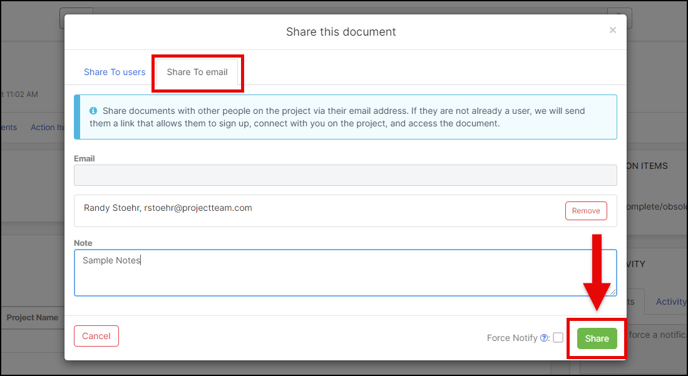
The second tab in the share window, labeled "Share to Email", allows you to enter the email address of any other person on your project that may or may not already be a user on the project. Sharing to an email address is an easy way to bring in additional users to the project allowing you to collaborate with them more efficiently.
When you choose to share to email, fill in the following information:
-
Email (Required): Enter at least one valid email address. When you click into the field, you will automatically be presented with a list that shows all contacts that exist in the project directory. When searching for an email address, you can type a user's name or email to help you find the appropriate people. You can choose to email one of them or add a new email address.
-
Note: This field is for adding a custom message to the email that will be sent to the people defined in the Email field.
After you finish adding the Email and Note fields, click the Share button. The people in the Email field will receive an email with a button in the email that will take them to ProjectTeam.com. If they are not already a user, they will be asked to create an account. Requiring them to create an account allows you to track exactly who and when other users are viewing your shared information.
Once information has been shared, it can't be taken away. That way you never have to worry about information being accidentally lost or deleted. However, if you share information to another user but later decide that they don't need access to that information anymore, you can halt that user.
Halting the user on a form "freezes" that form so they no longer receive updates on information. The form will be taken out of the halted user's standard logs and even if they view the form they will see a banner notifying them that information may be out of date.
Once a user is halted on a form, they can no longer:
-
Edit form fields
-
Start new workflows
-
Attach files
-
View comments
-
Share to other users
-
Add reference links
-
View the form in reports or dashboards
To halt a share group, navigate to the appropriate form and click the View All link in the Access panel. A modal window appears that shows each share group's access. You'll also notice a dropdown next to each share group that has been shared. If you click on the dropdown, you'll see the option to "Halt" in the list.
You can "Unhalt" share groups once they've been halted which gives them full access again on the form if needed.