Adding Attachments to Forms
Every form type in ProjectTeam.com includes a default Attachments panel that allows you to upload files, photos, videos and more.
In many cases, the attachments of a form can be just as important as the fields of the form. Below are examples of attachments you may want to include on your forms:
-
On field reports, include photos taken throughout the day
-
On RFIs, reference a sketch or specific page on a drawing
-
On inspections, include product specification documents
-
On material deliveries, include tickets and signatures
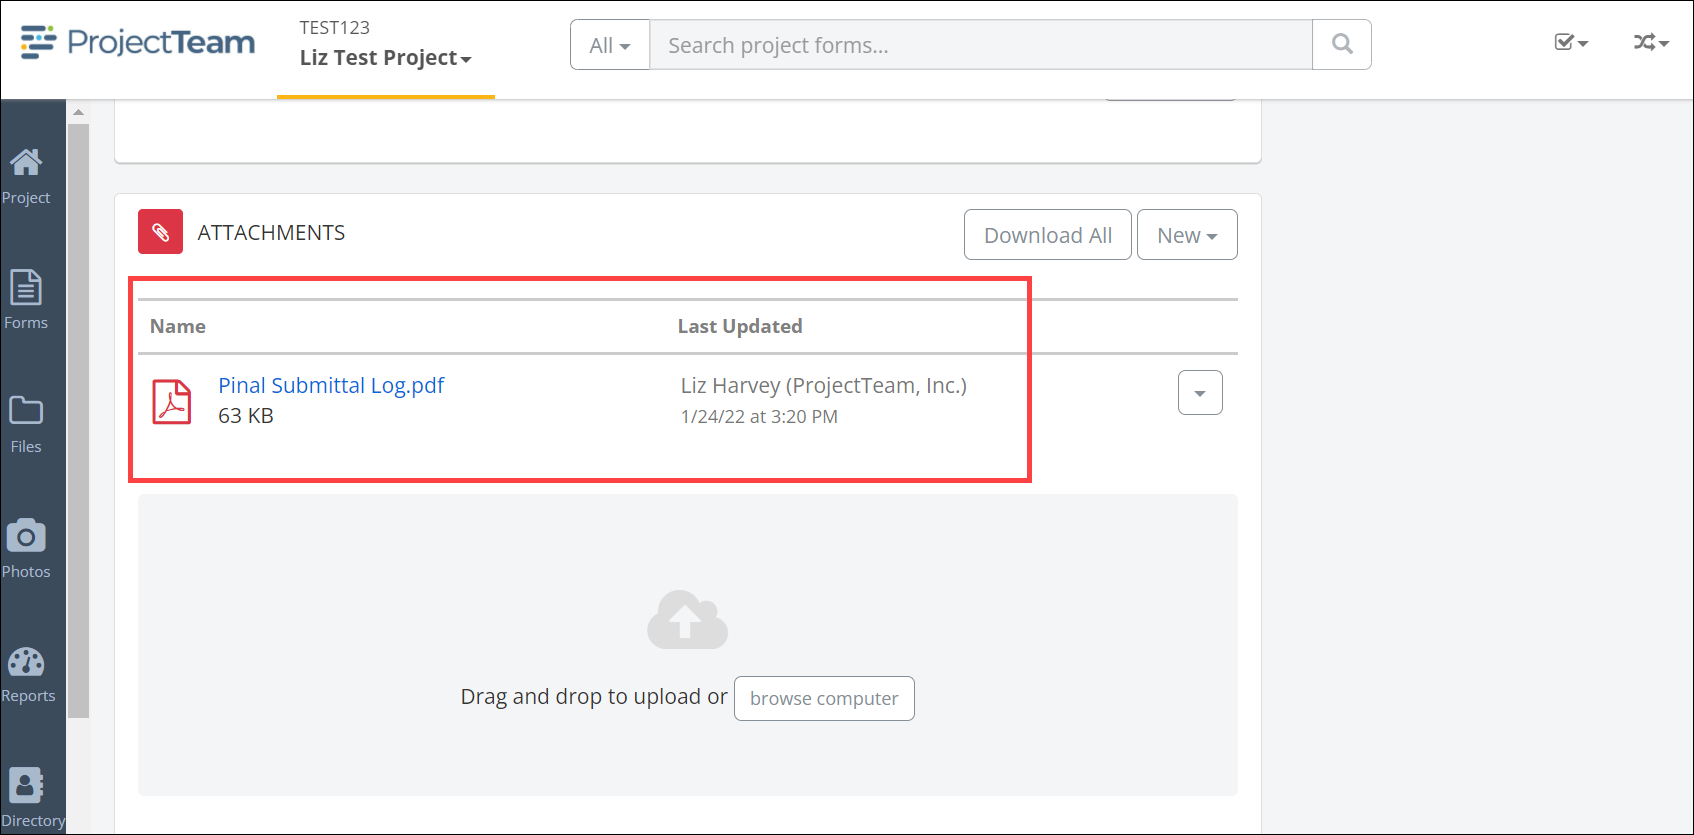
Attachments list
In the attachments panel, you'll see a list of all existing attachments included with the form. The list shows the following information:
-
File name
-
File size
-
User's name that uploaded the latest version of the file
-
Date and time of when the latest version was uploaded

Add new attachments
There are a few different ways to add new attachments to a form.
Drag and drop
-
Keep ProjectTeam.com open but minimize your browser screen so you can also see your desktop background or other application
-
On your desktop, highlight all files you want to attach to the form
-
Drag and drop the files over to the attachments panel in your ProjectTeam.com form
Select files from your computer or device
-
Click the New button and then click the Upload New link from the dropdown
-
A file explorer window appears showing you all files on your machine
-
Choose the files that you want to attach to the form and attach
Add files that already exist in ProjectTeam.com
In addition to adding new files from your computer, you can also copy existing files that have already been added to the file structure or an attachment on another form.
-
Click the New button and then click the From Files link from the dropdown
-
A modal window appears showing you a folder structure of existing files that you have access to within ProjectTeam.com
-
Click through the folder structure to find the file you want to copy over to your form
-
Once you get to the correct file name, you'll have the opportunity to choose a specific version. Click the checkbox next to the version and then click the Add button
Download all existing attachments
The attachments on a form typically act as additional documentation to the form fields. In many cases, you might want to download all attachments quickly so that you can review the information and provide a response to the form.
To download all of the attachments on a form, simply click the Download All button in the attachments panel. A zip folder should be created and start downloading onto your computer. In that zip folder you'll see all attachments that were included on the form.
Attachment actions
Next to each attachment, you'll see a dropdown. The dropdown shows a list of actions that can be performed on each of the files. They include:
-
Properties: View the meta data of the attachment including file name, description, custom fields added to the file form, previous versions, and action items.
-
Rename: Brings up a modal window that allows you to quickly edit the name of the attachment.
-
View: Brings up the attachment in a file viewer. ProjectTeam.com has a viewer that will show .PDF, images, and .TXT files. Other file types such as MS Word, Excel, and PowerPoint will be downloaded to your computer instead of in the viewer.
-
Download: Downloads the individual file to your computer.
-
Upload New Version: Allows you to upload a new version of the attachment. Clicking on the link opens up the files on your computer. You can choose any file to upload as a new version. After the upload has finished, a version tag will be shown next to the file name giving a clear indication that a newer version has been added.
-
Obsolete: Marks the file as obsolete. Obsolete files will not be shown in the attachments panel. As with other areas of ProjectTeam.com, once information has been added to the system and shared, there is no way to delete the information. This prevents it from being lost. However, users can obsolete the attachment which essentially "hides" it from the current view.
-
Delete: You will only see the delete option if the form has not yet been shared. Once the form has been shared, the option to delete will be taken away and you will only be able to obsolete the attachment. Deleting the attachment will completely remove it from the system and it will not be recoverable.