- Overview
- Field types that you can make Required
- How to make a custom field Required
- How to make a custom column on a collection Required
Overview
The ability to customize forms by adding custom fields in ProjectTeam.com is a core need for many organizations. When adding new fields, you can mark a field "Required" to make sure data in the field is filled in before users save a record.
Once a field is marked required, any users that have read/write access to the field will be required to enter a valid value before saving. The save button on forms will not become enabled until all required fields are completed. However, users that have no access or read-only access to the field will be able to save the form without entering a value (because they cannot access the field to add data).
Field types that you can make Required
Field types that you can make required:
- Account Code
- Cost Period
- Date
- Number
- Number (Auto Number)
- Number (Currency)
- Phone Number
- Picklist
- Project Directory (Business)
- Project Directory (Contact)
- Text (Multiline)
- Text (Single Line)
- URL
Field types that you can not yet make required:
- Checkbox
- Collection (Although you can set columns of a collection as required)
- Collection (Reference)
- Picklist (Cascading)
- Text (Multiline Rich Format)
Make a custom field "Required"
Note: Editing the properties of a form type is only available to Project Administrators. You can only mark custom fields "required" if they were created by your company. You cannot change system fields or fields created by other companies.
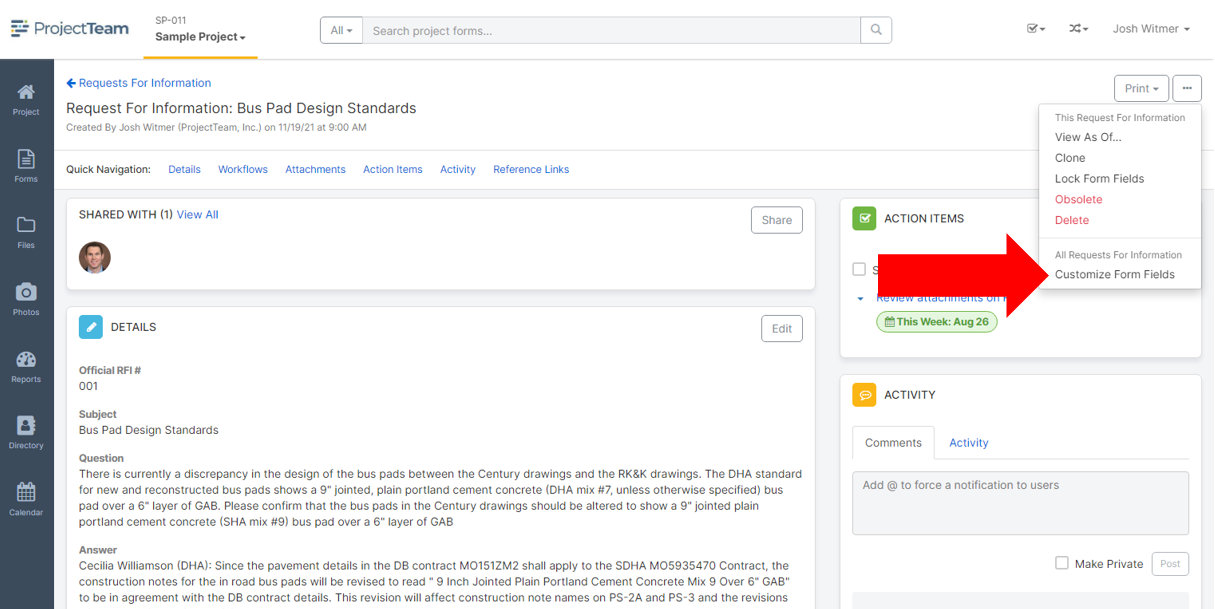
- Navigate to the form properties of a form type (In my example, I clicked the Customize Form Fields option in the "options" dropdown when viewing a form).
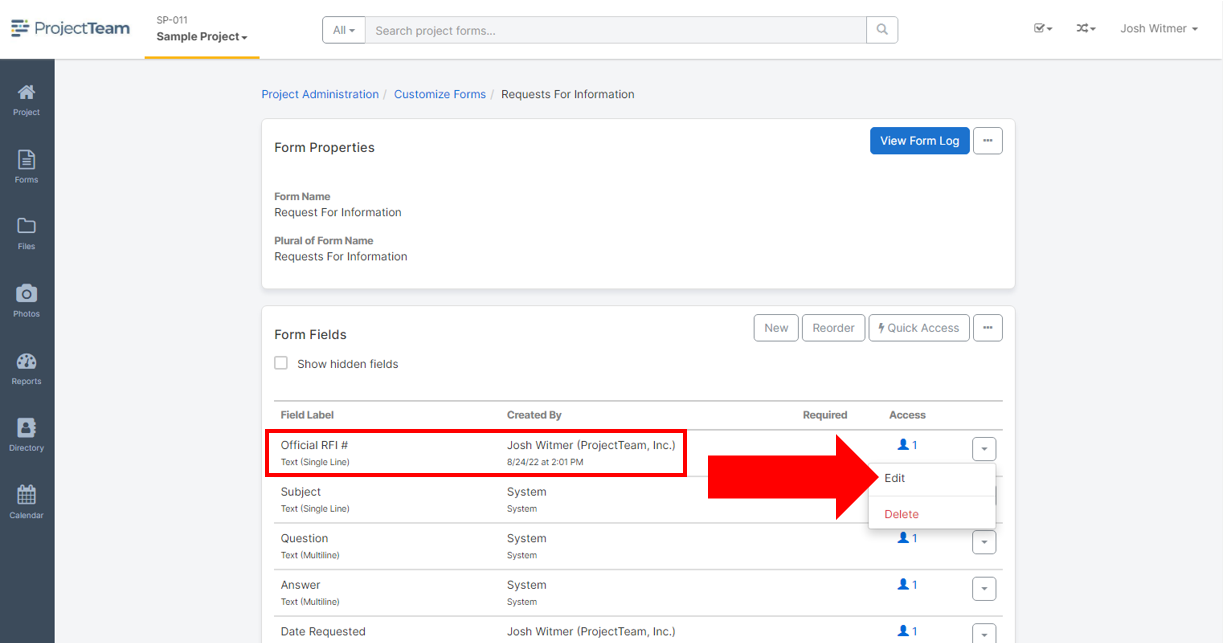
- Find the custom field you want to make required and click the "Options" dropdown and then choose the Edit link (Or click the New button to create a new custom field).
- In edit mode of the custom field, click the checkbox under the "Required" label. Then click the Save button to save your changes. Checked means the field will be required for all forms starting after you check the box. Unchecked means the field will not be required on forms.

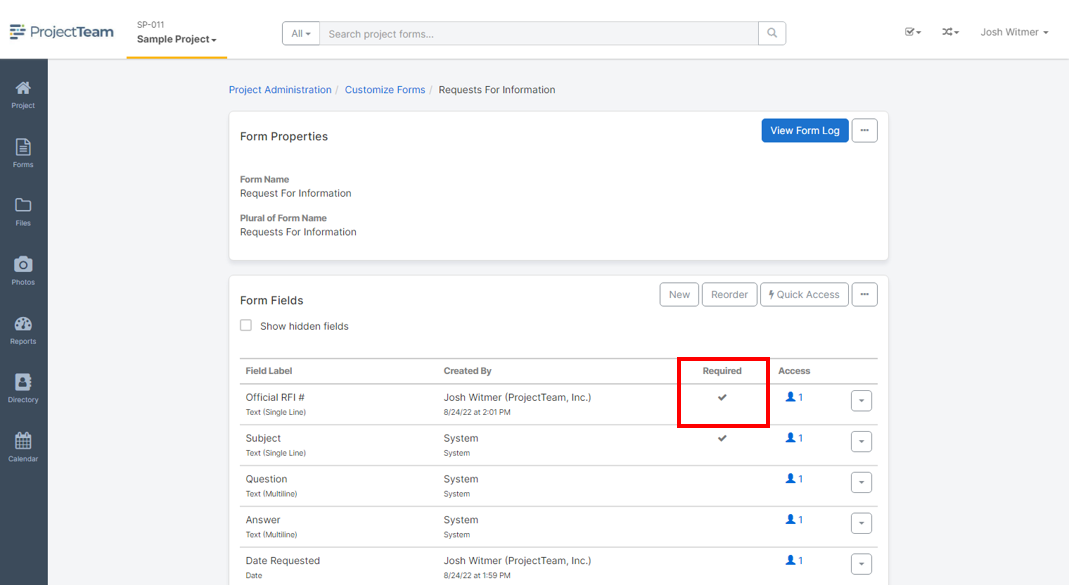
- Once a field is marked required, you will see the check under the Required column when viewing all fields of the form type.
Make a column on a collection "Required"
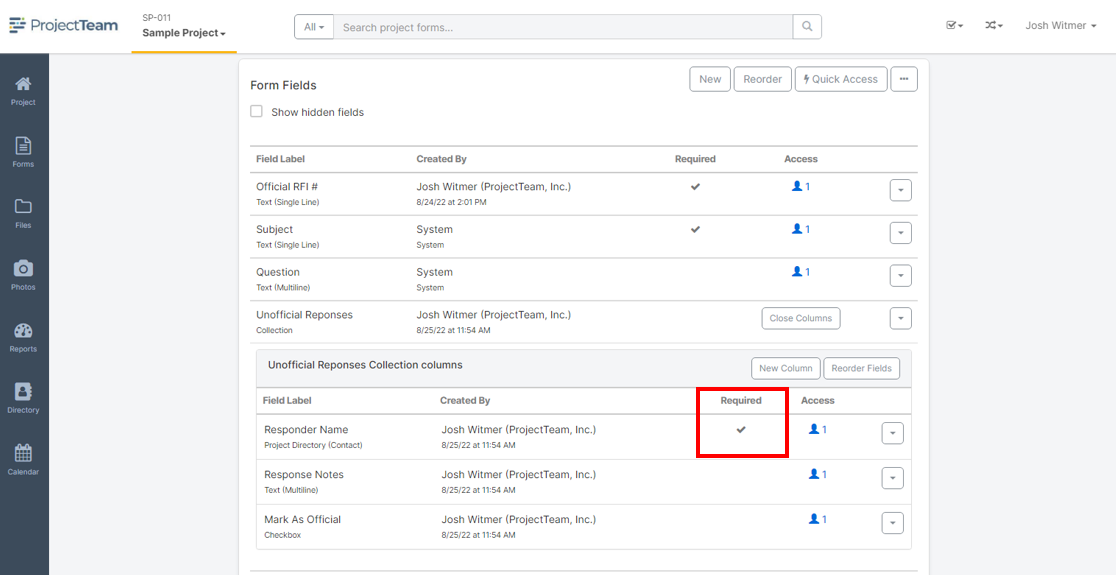
In addition to top-level fields of a form, project administrators can also mark columns of a collection required.
- Navigate to the form properties of a form type (In my example, I clicked the Customize Form Fields option in the "options" dropdown when viewing a form).
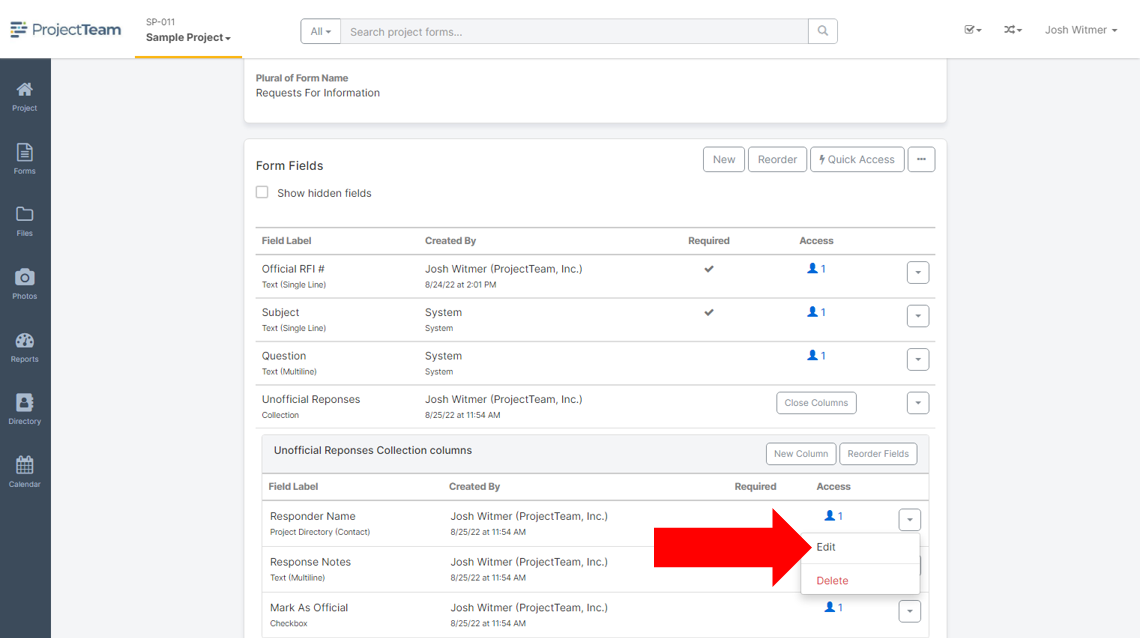
- Find the custom collection and click the View Columns button to view all columns. Then, find the column you want to make required and click the "Options" dropdown and then choose the Edit link (Or click the New button to create a new custom field).
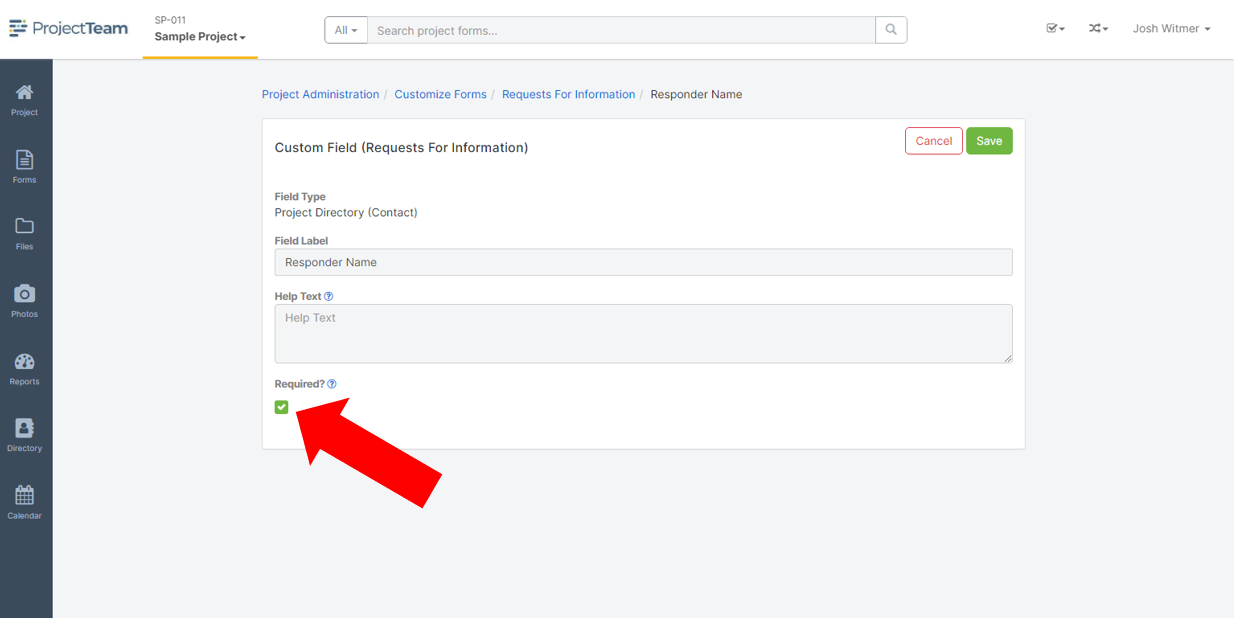
- In edit mode of the collection column custom field, click the checkbox under the "Required" label. Then click the Save button to save your changes. Checked means the field will be required for all forms starting after you check the box. Unchecked means the field will not be required on forms.
- Once a field is marked required, you will see the check under the Required column when viewing all fields of the form type.