Read below for detailed instructions on how to correctly use the Text Extraction tool.
Text Extraction Instructions
1. Navigate to the Drawings log inside your project and click the New Package button
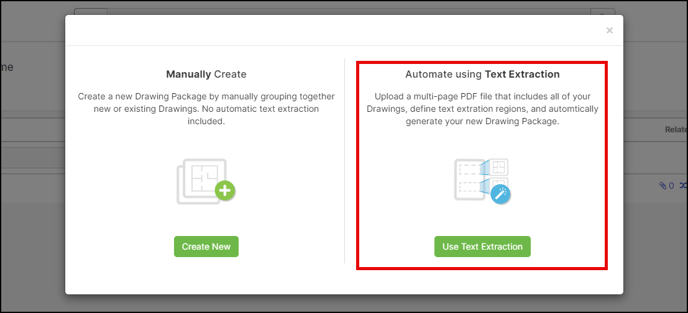
2. In the modal window, click the Use Text Extraction option
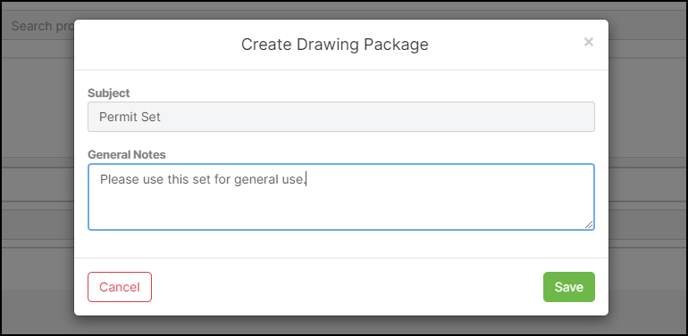
3. Add a Subject and provide General Notes about your new Drawing Package (you will be able to edit this information later if needed).
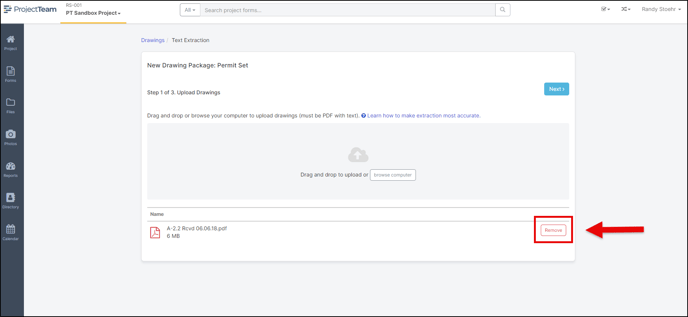
4. Drag-and-drop or browse your computer to add your files. You can upload a single multi-page PDF or many single-page PDFs in this step. For the Text Extraction tool to work, you will need to include PDF files that have readable text (rasterized PDFs do not work). You can read more about file requirements here.
Once you upload your files, you will see them listed below the upload area. If you mistakenly added a file, click the Remove button to clean up your list before going to the next step.
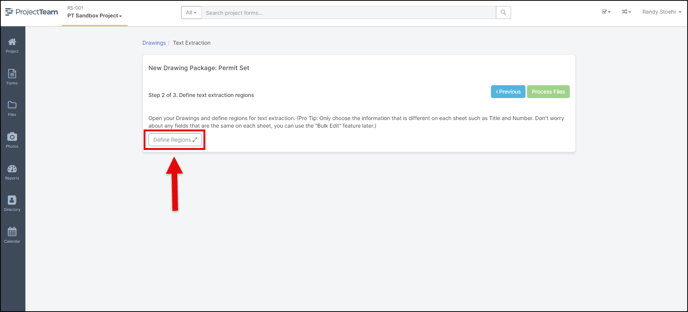
5. After uploading your files, it's time to define the regions of your file that will be used during the extraction process. At this step, click the Define Regions button to open the first file from your previous step in fullscreen mode.
6. In fullscreen mode, navigate to a page within your file that has a layout representative of all the pages.
6.1 - Zoom into your drawing to make the text easier to read
6.2 - Use the Pan tool to move to an appropriate area of your file
6.3 - Click the Region Icon
6.4 - Draw a region around text of your file
6.5 - Choose a field to map your new region to
6.6 - Click Add to save the region mapping
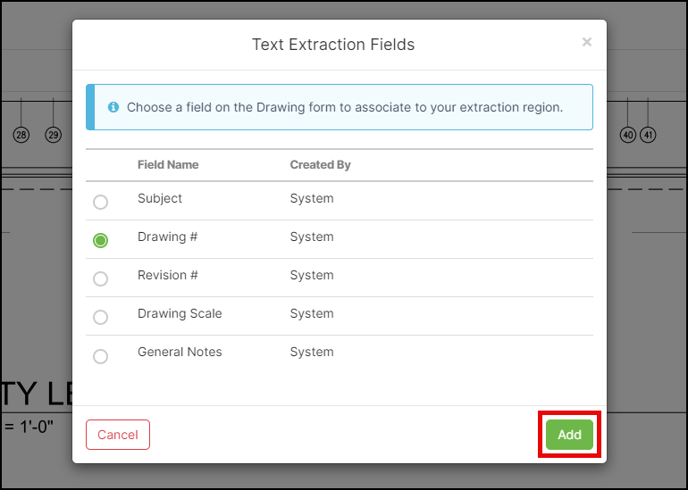
You can map any single or multiline text field, including system and custom fields, to your various regions. It does not matter where on your document you have the regions and the text within the regions can be horizontal or vertical.
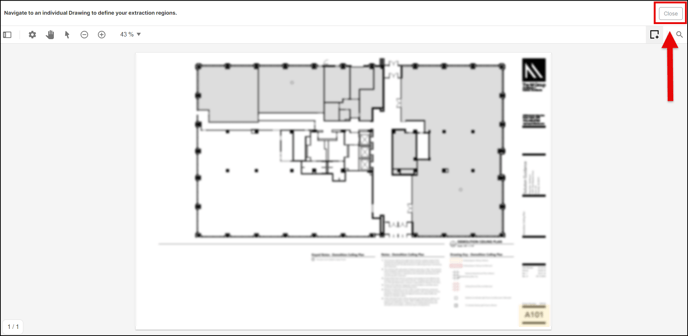
7. Once all of your regions are defined, click the Close button at the top of your fullscreen window.
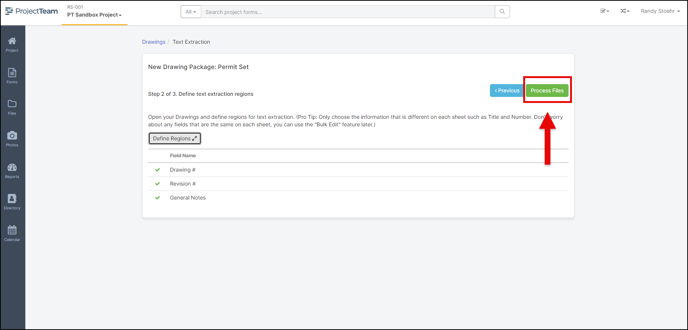
8. You will see all regions/fields you defined in the list view. If you need to make any adjustments before moving to the next step, reopen the Define Regions fullscreen view.
8.1 - Review the fields you defined
8.2 - Click the Process Files button to start the Text Extraction process
9. While your files are processing, you can navigate back to your Drawings log or anywhere else in the system. When the extraction process is finished, an email will be sent to your email address letting you know it is ready for review.
If you navigate back to your log, you will see a banner reiterating that the extraction process is still running. Once complete, the banner will switch to instructions on how to review and confirm the extracted information.
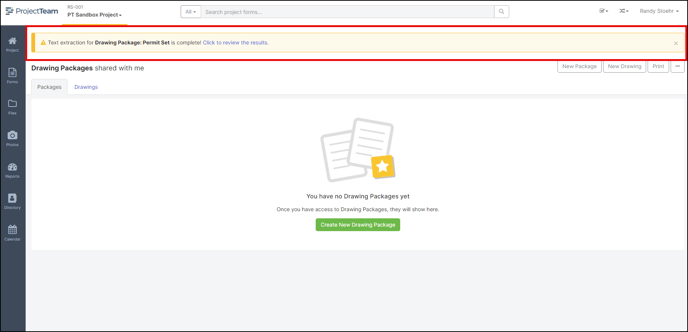
10. Once the extraction process is complete, you will receive an email and see a banner on top of your Drawings log. Click the link in the banner to review and confirm the Drawings found during the process.
Note: Only you, the user that started the Text Extraction process, will see the banner on top of the Drawings log. You have 72 hours to review and confirm the information before the package gets deleted.
11. In the "Review and Confirm" screen, you will notice four different sections:
11.1 - A list of individual Drawings found during the extraction process
11.2 - A view of an individual Drawing corresponding to 11.1
11.3 - The form fields of the individual Drawing corresponding to 11.1
11.4 - A footer that allows you to quickly confirm and navigate to the next Drawing
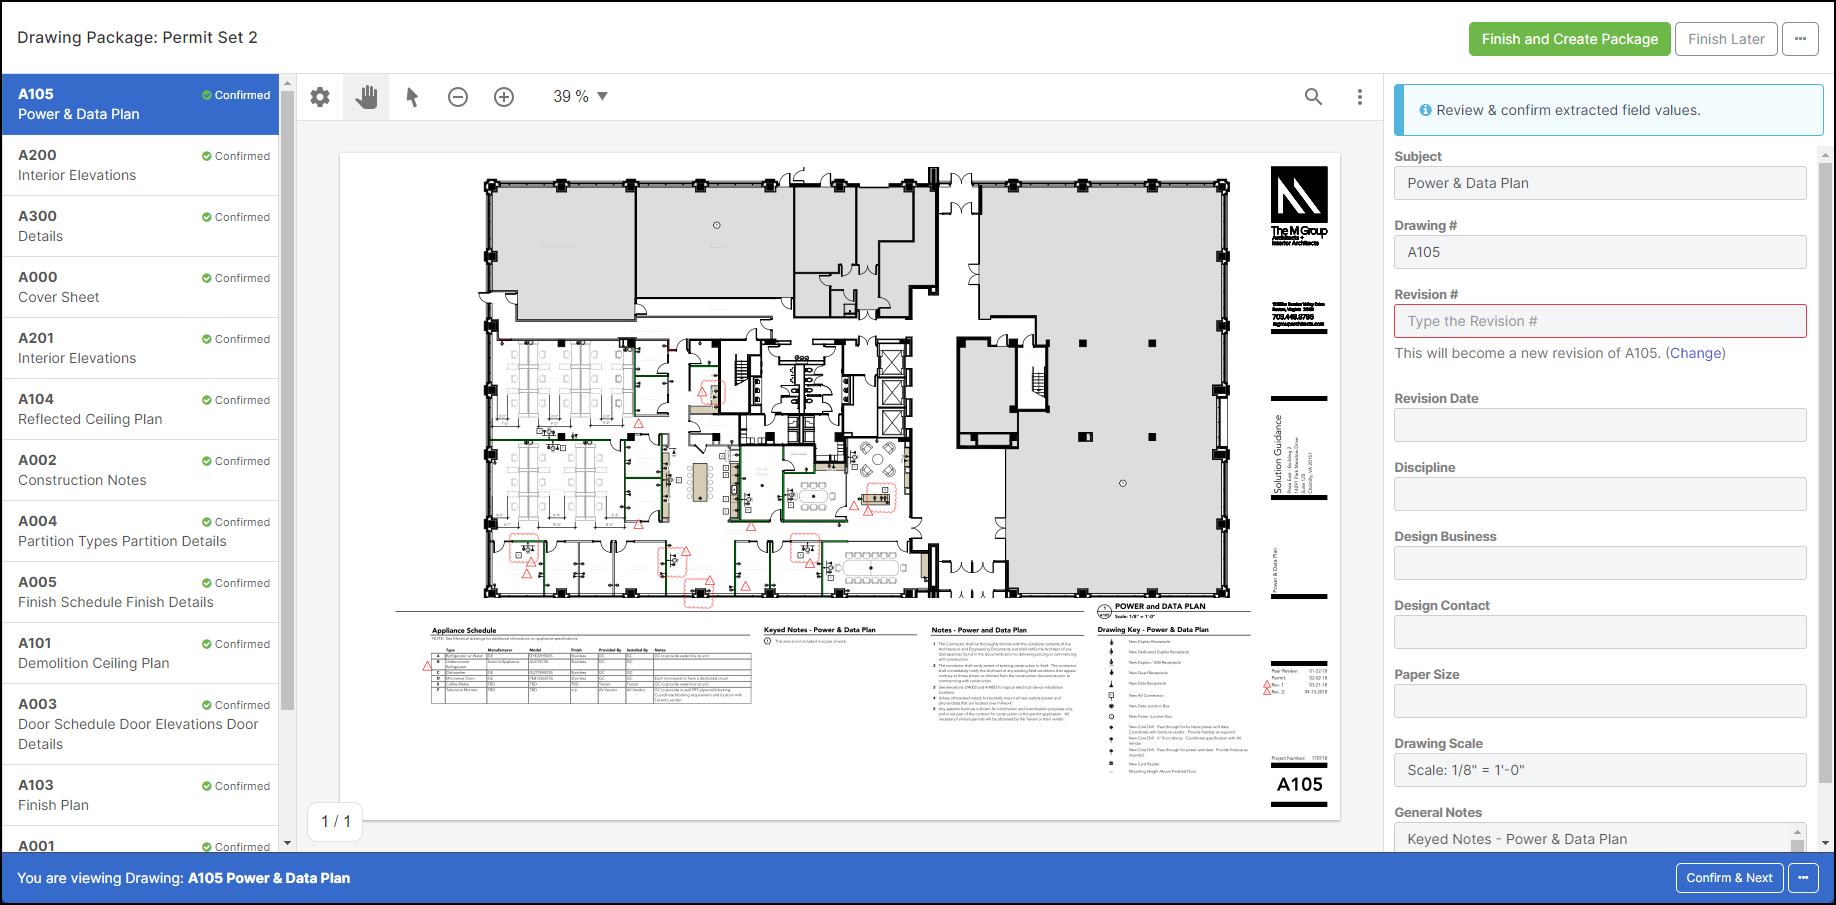
At step 11, it is your responsibility to review and confirm the extracted information for each individual Drawing. The Text Extraction tool will do its best to pull data from the file but may have missing data depending on the setup of the regions and layout of your files.
In 11.1, if the extraction did not find any text for either the Subject or Drawing # fields, it will display:
-
DRAWING # NOT FOUND
-
SUBJECT NOT FOUND
For 11.3, the form fields on the left side of the viewer will display all fields you have access to except the following field types:
-
Account Codes
-
Auto-Numbers
-
Cascading Picklists
-
Collections
If the newly created Drawing has a Drawing # that does not already exist, it will become the first revision. If the Drawing has a Drawing # that matches an existing Drawing, the new Drawing will become the next revision.
For 11.4, on the blue footer, click the Confirm & Next button to add a green checkmark to each confirmed drawing and move to the next in the list (11.1). The green checkmark allows you to click the Finish Later button, take a break, and revisit the review process later (assuming within the 72-hour time limit).
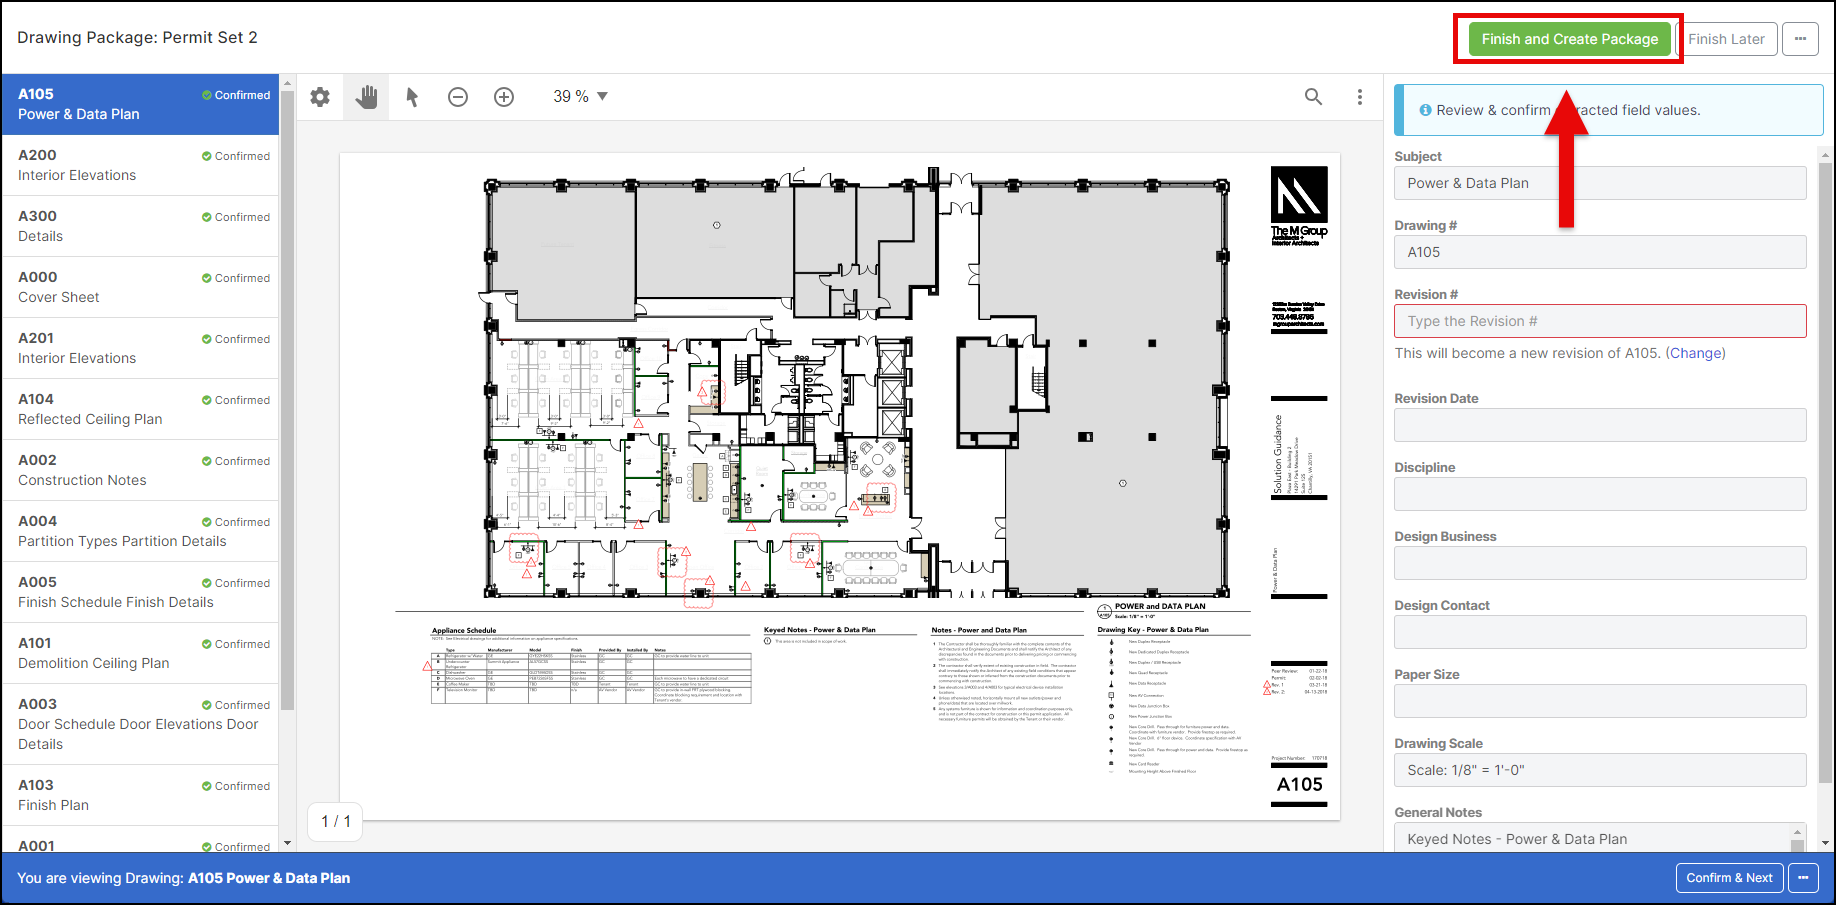
12. Once all the individual Drawings have been reviewed and confirmed, click the Finish and Create Package button.
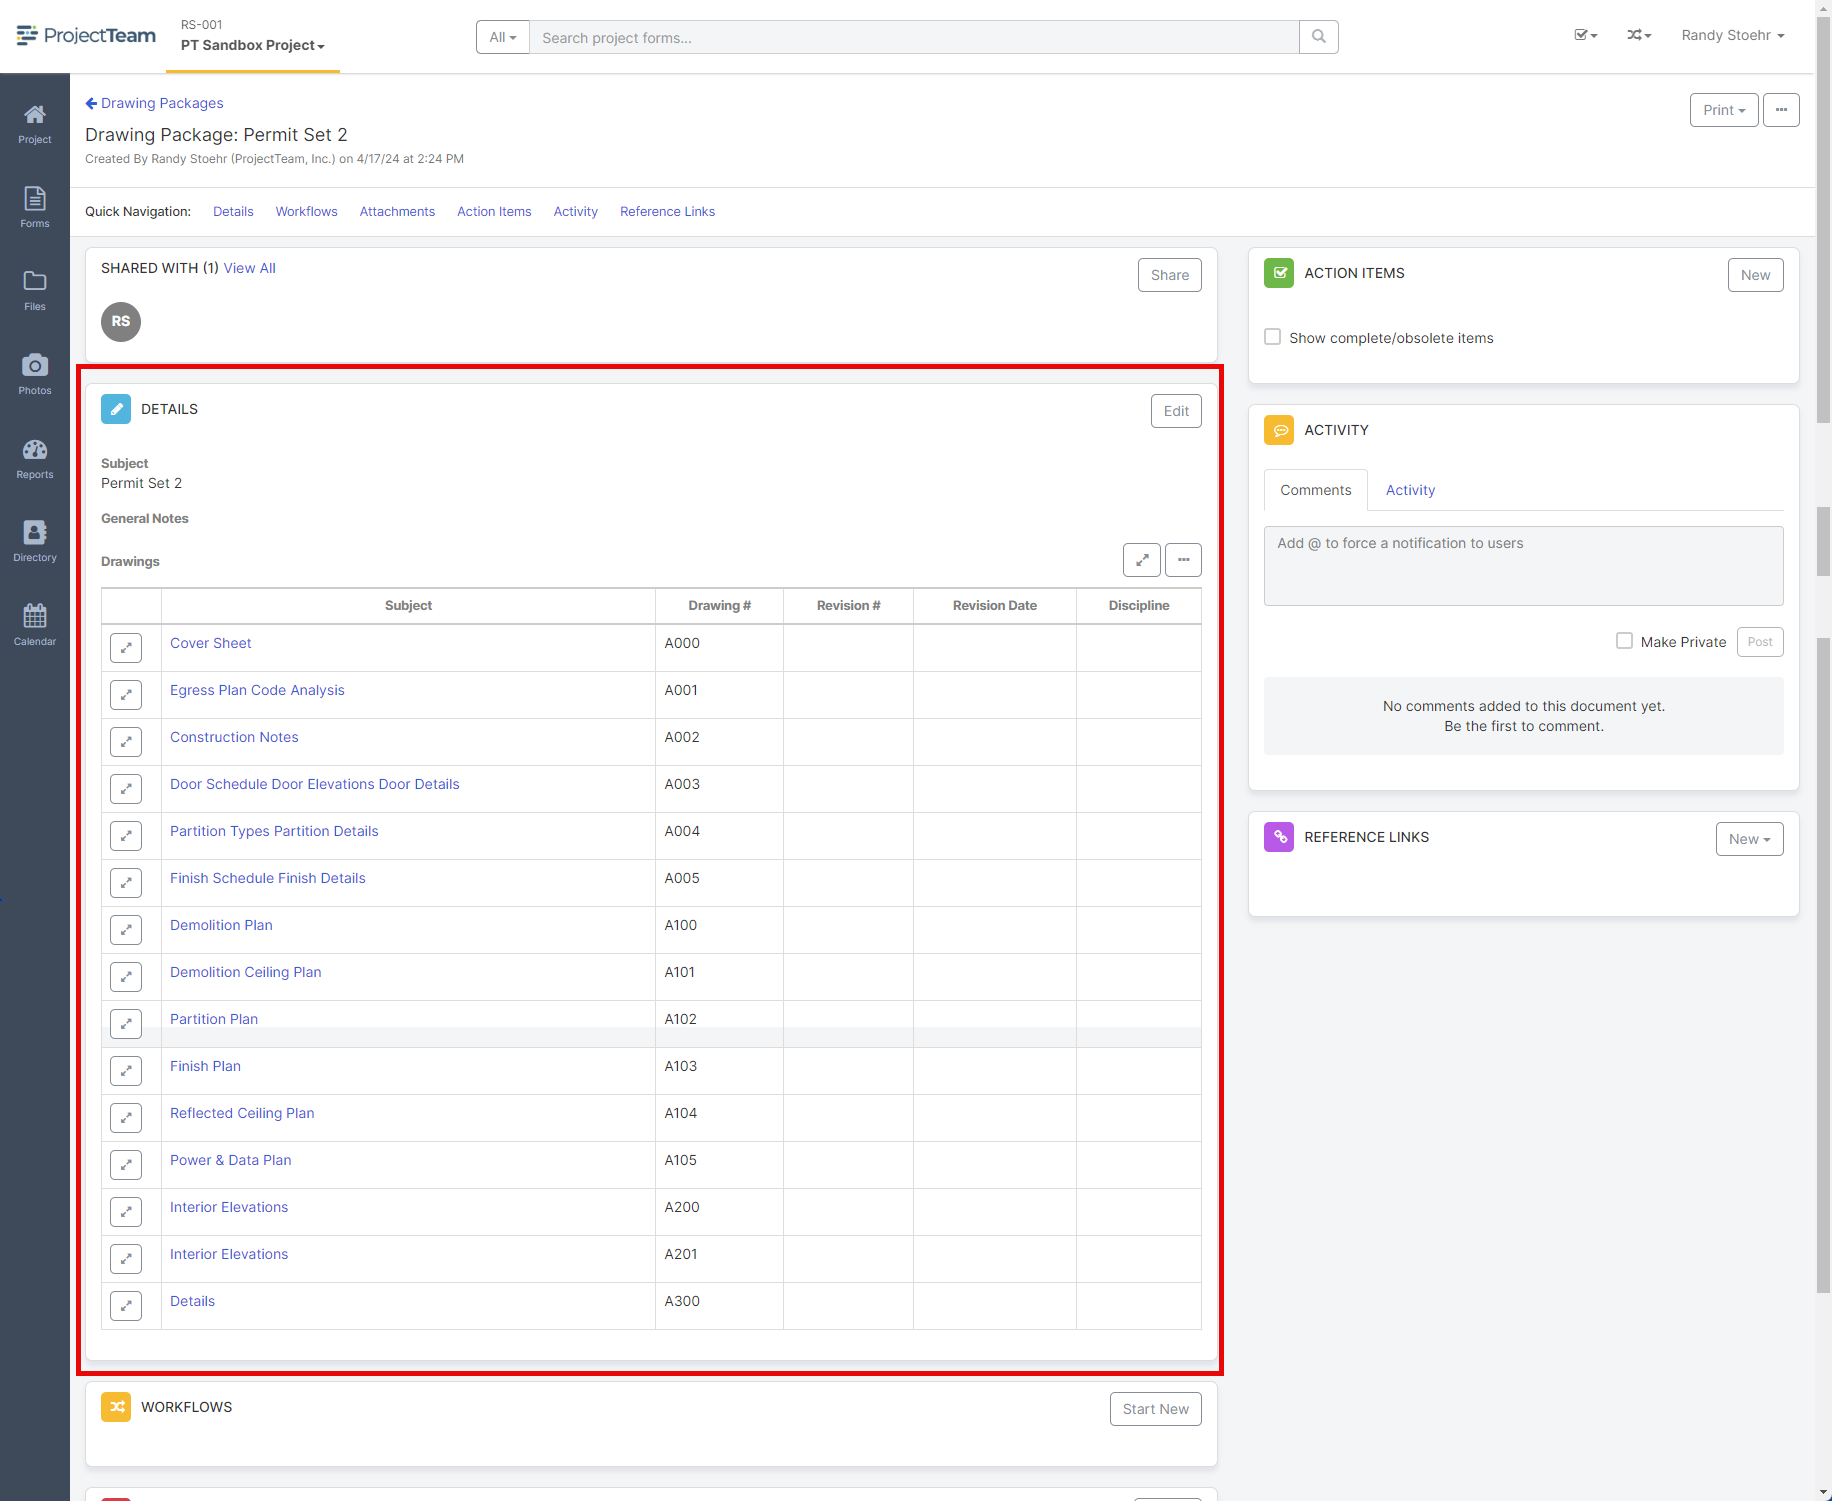
13. Finally, you are taken to the Drawing Package view, with all your new Drawings listed in the Drawings collection. The Text Extraction process is complete.