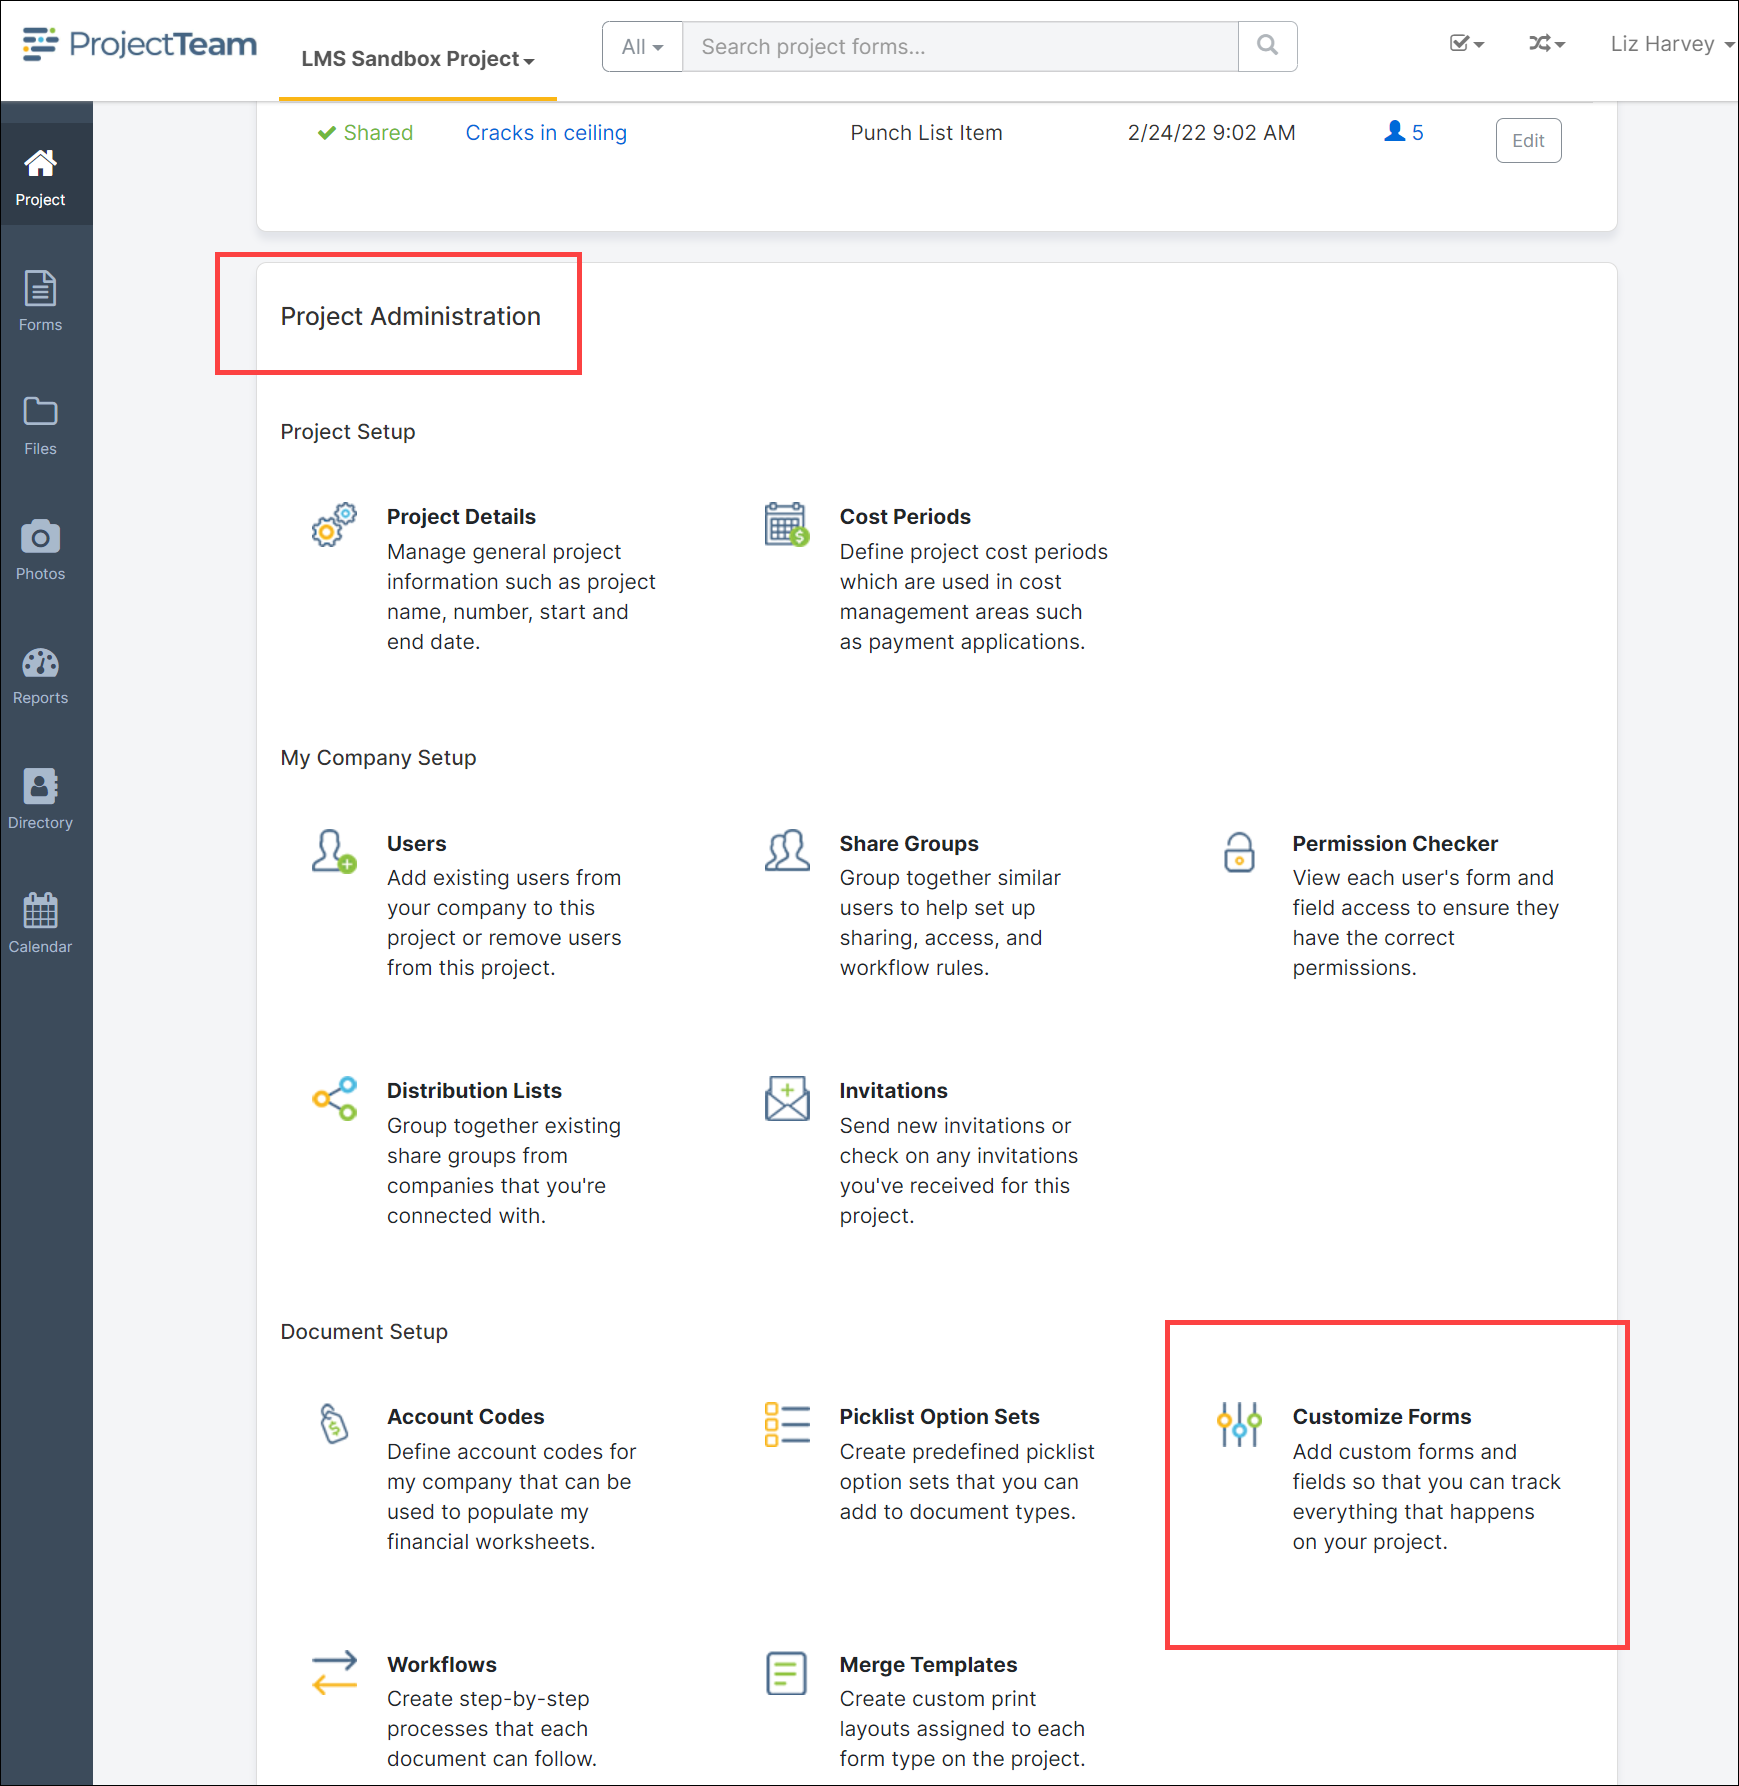
- Navigate to the appropriate project homepage.
- Scroll down to the Project Administration pane under Document Setup and click the Customize Forms icon:
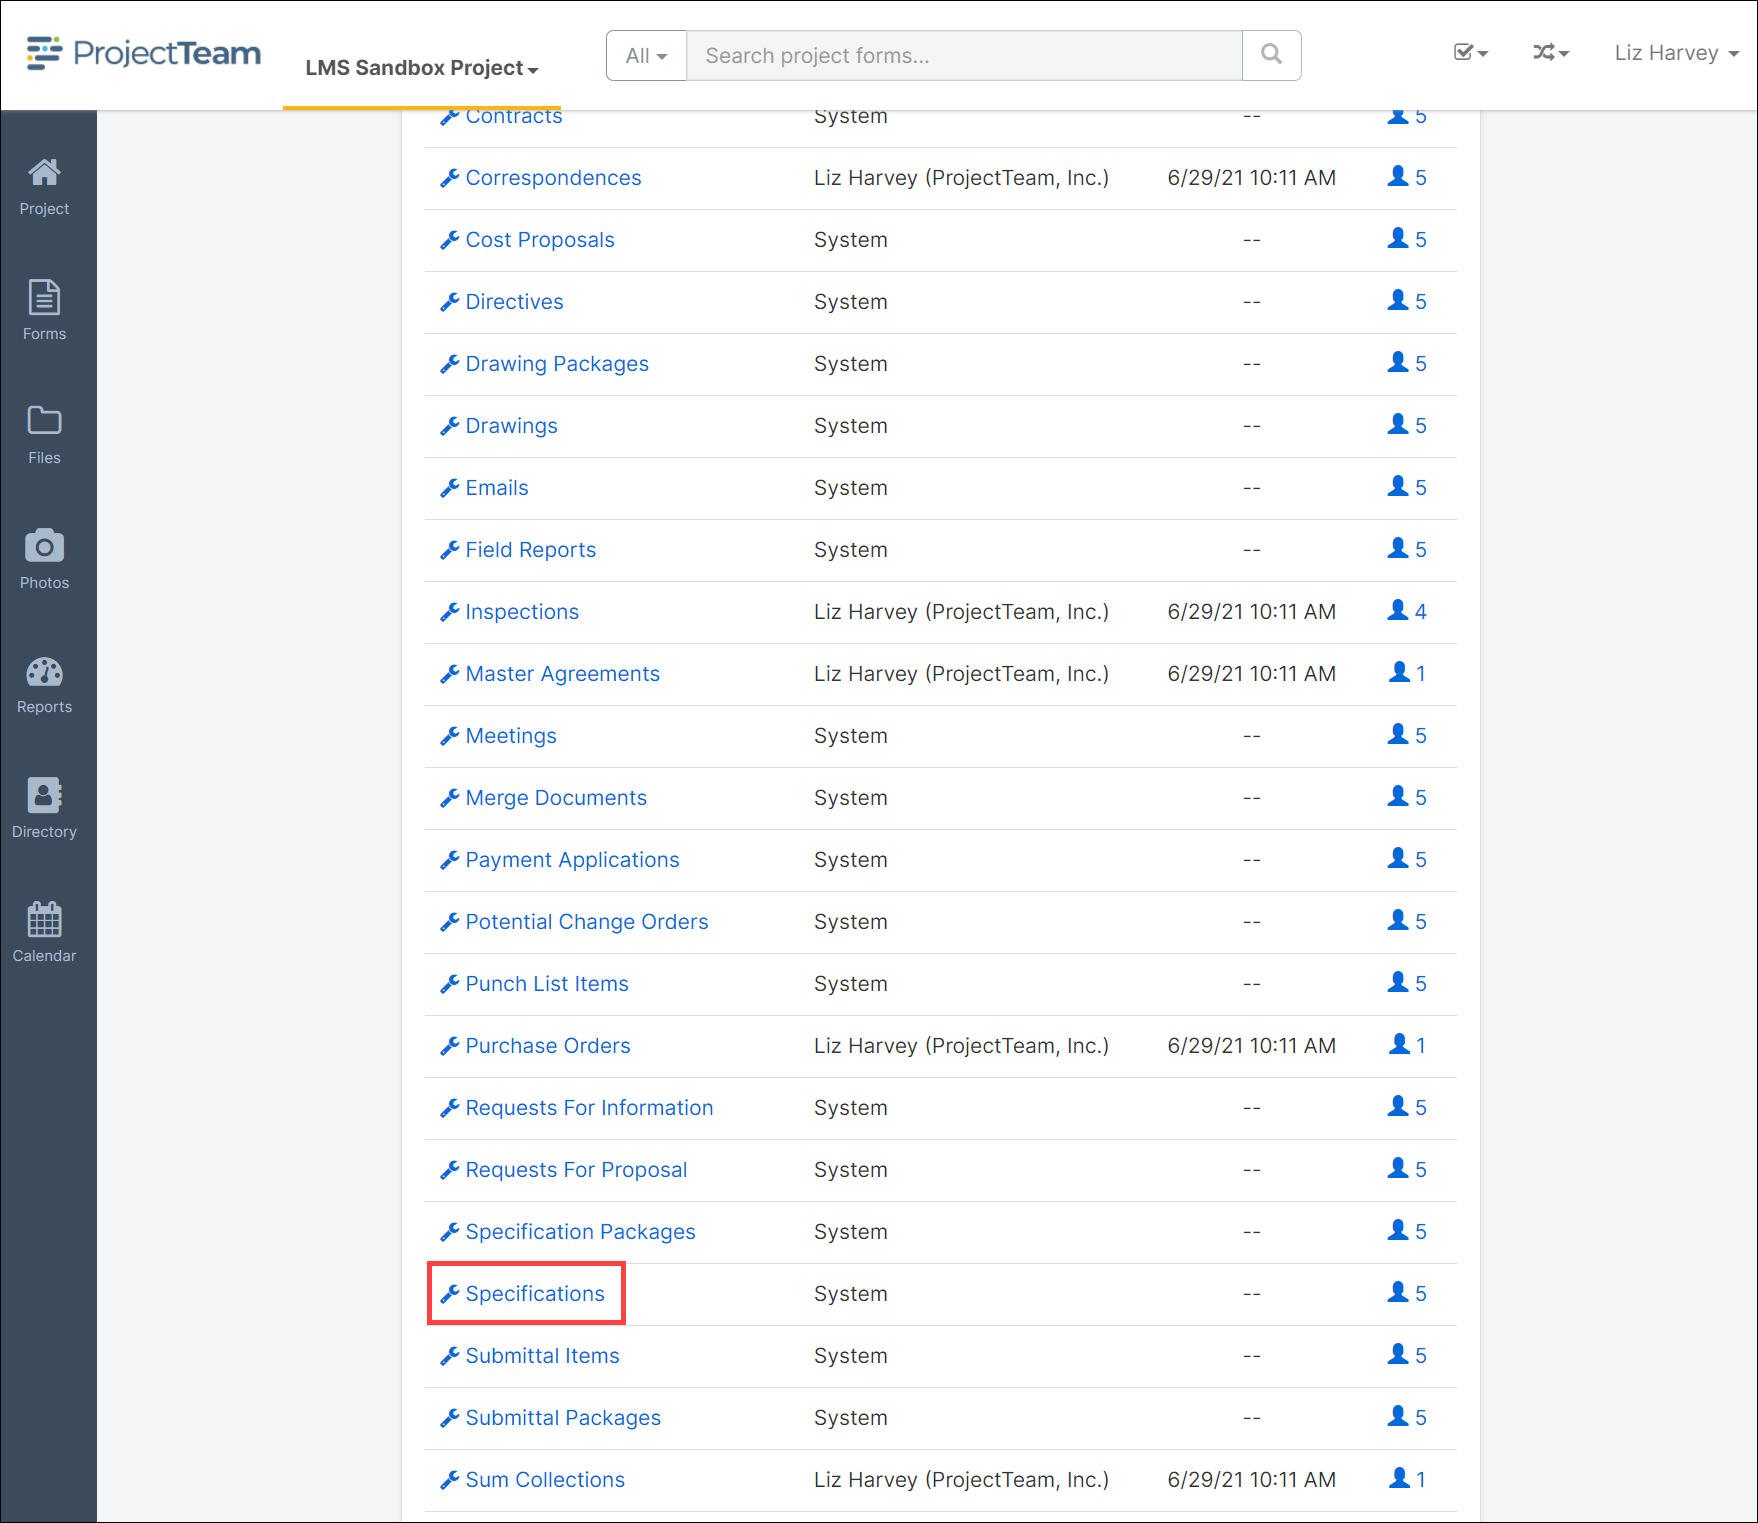
- The Customize Forms page will open.
- Scroll down and click the Specifications form link.
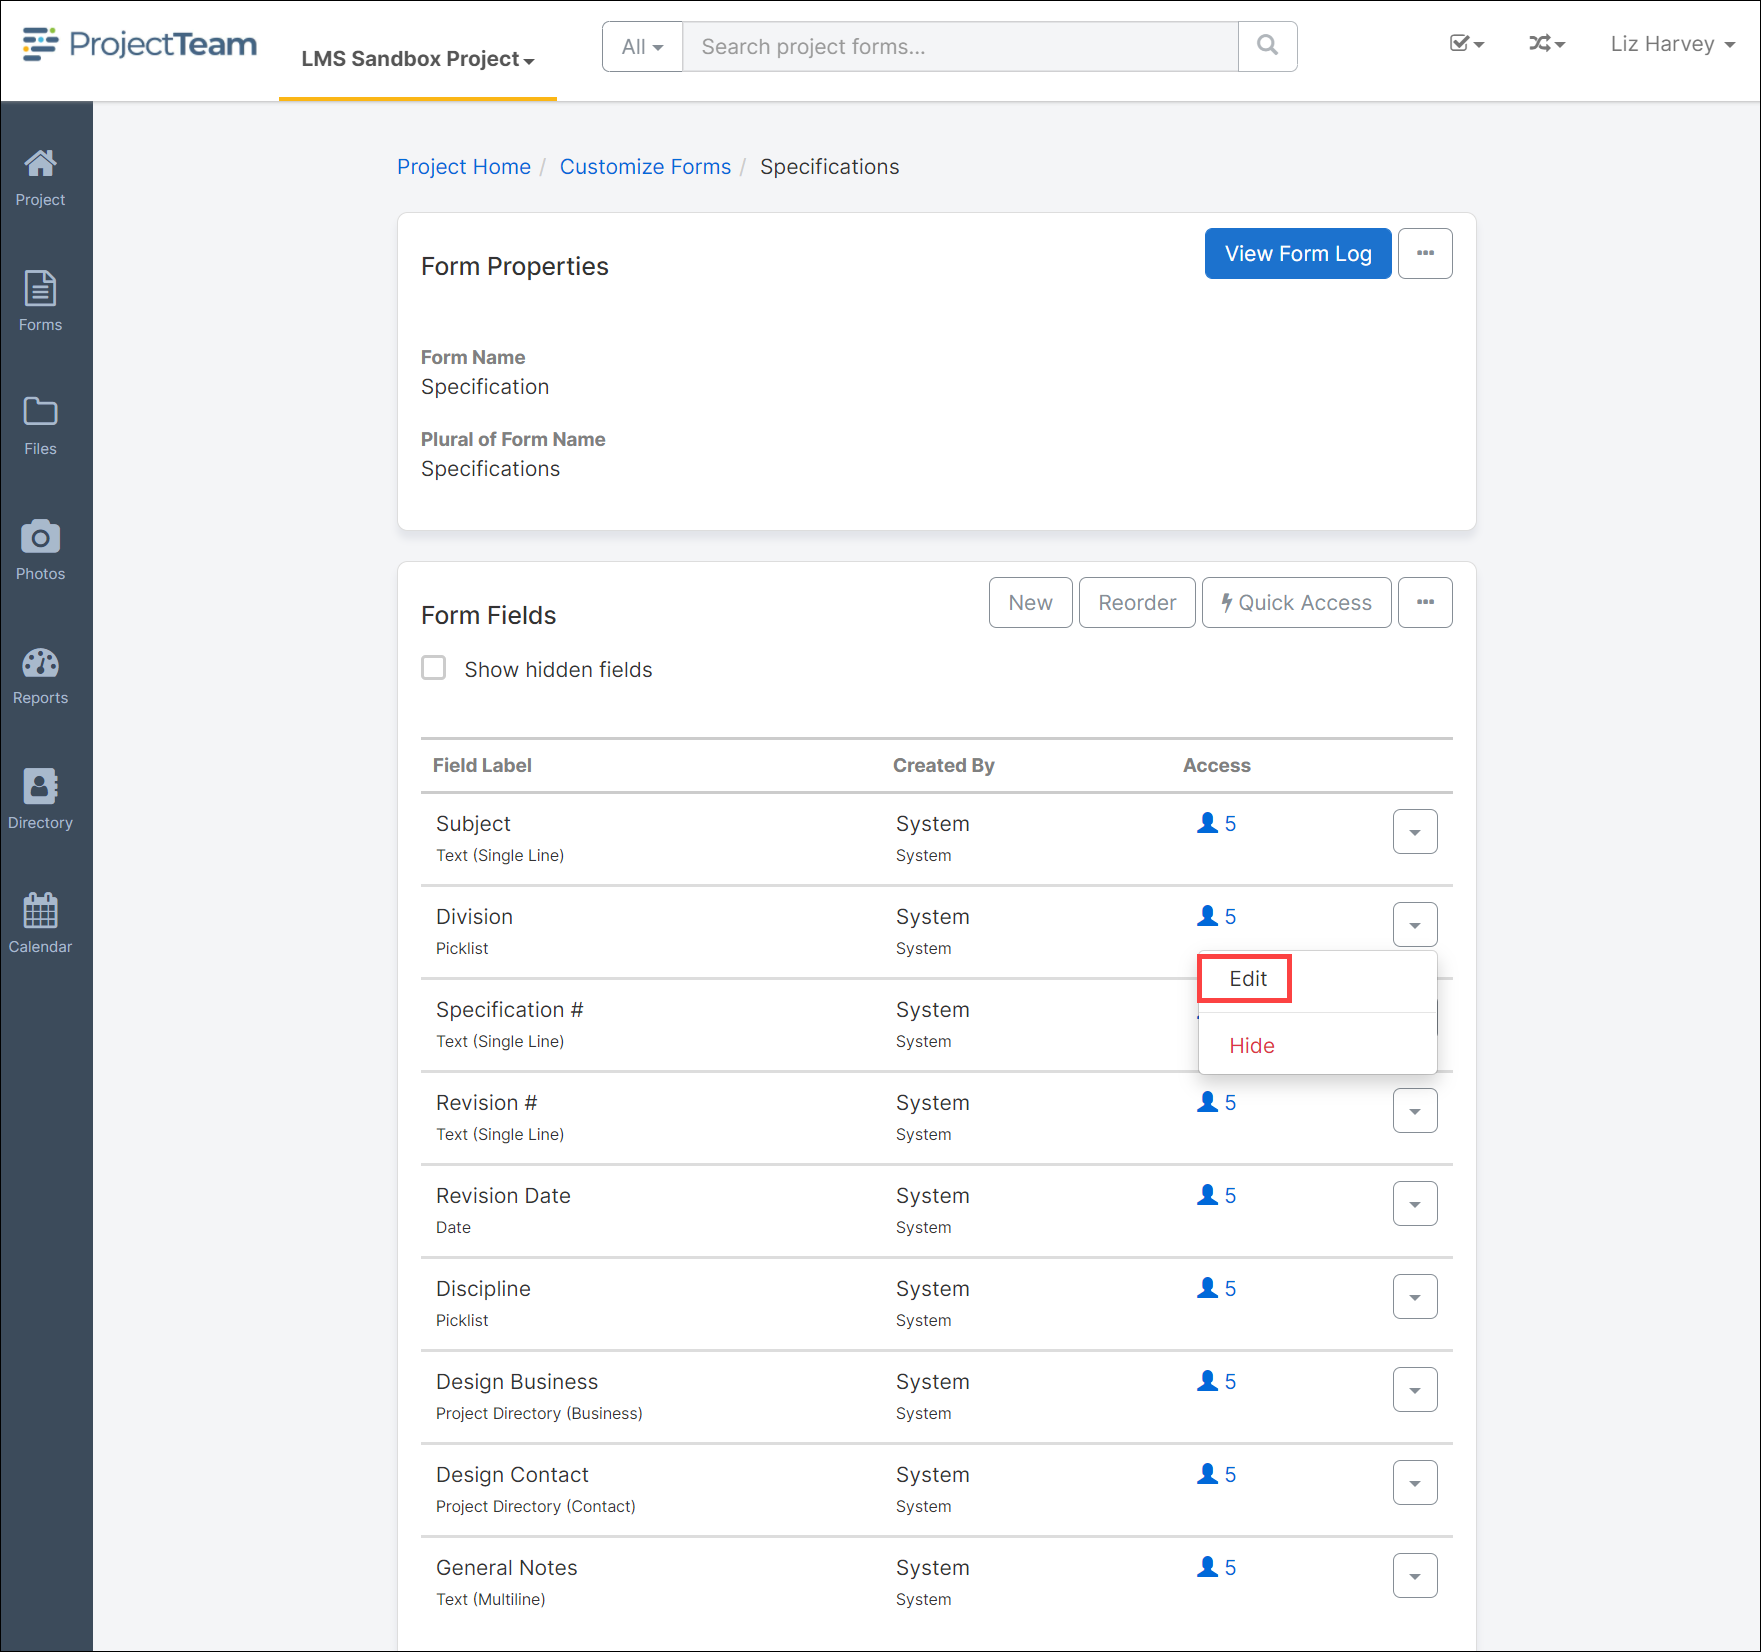
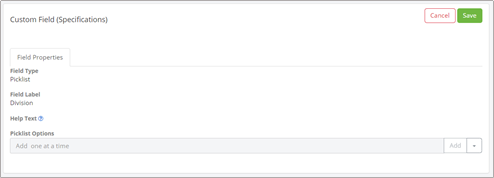
- The Form Properties window opens. Locate the Division field and click the dropdown arrow.
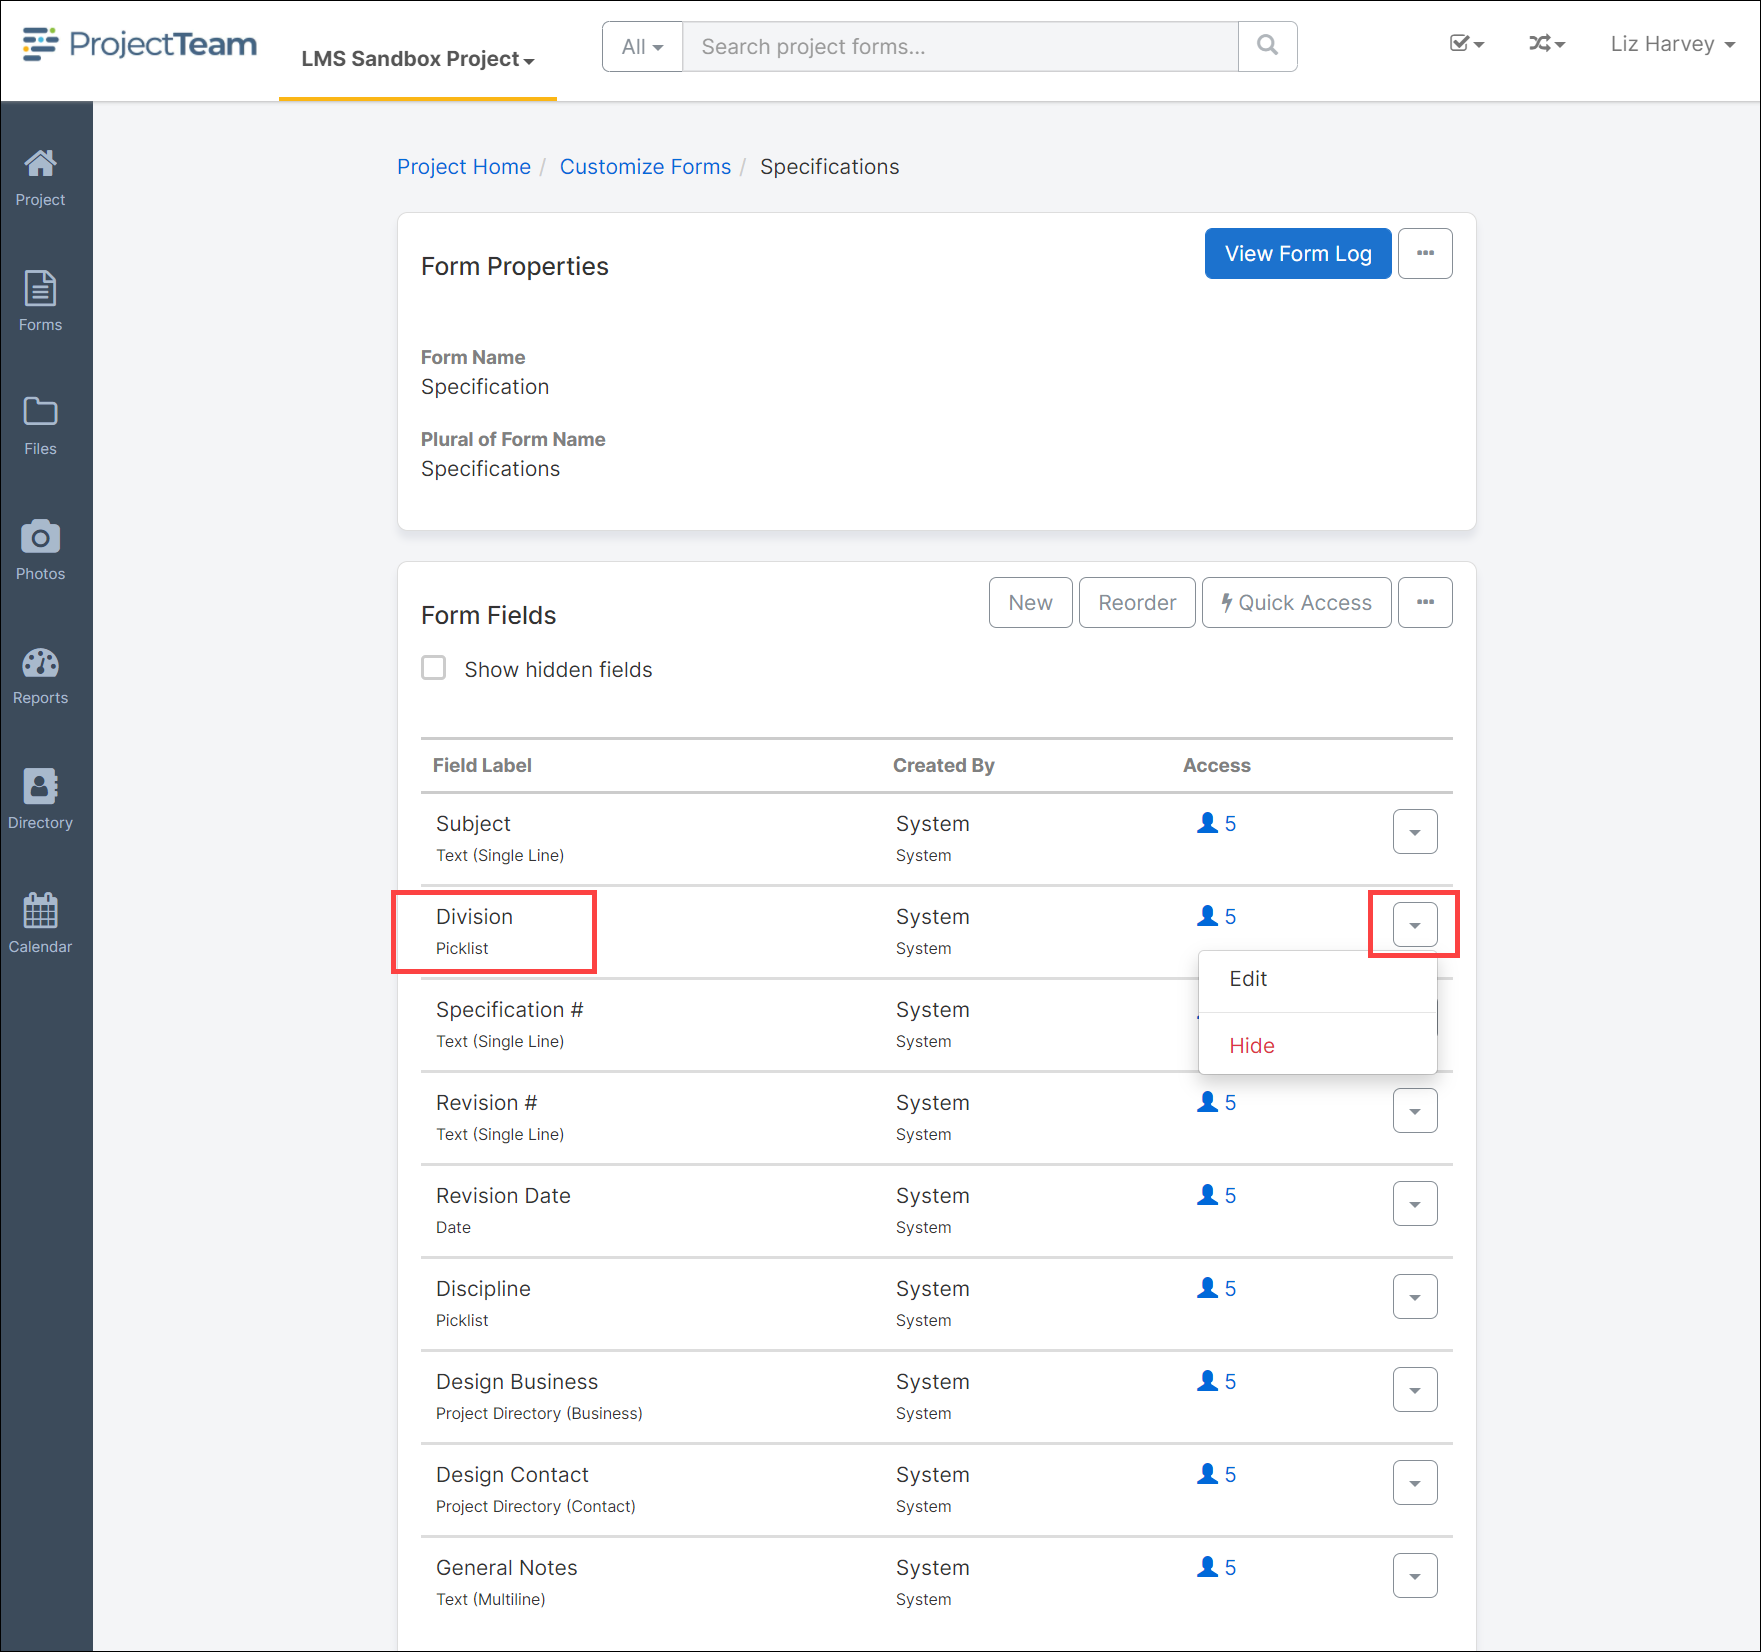
- Click the Edit button.
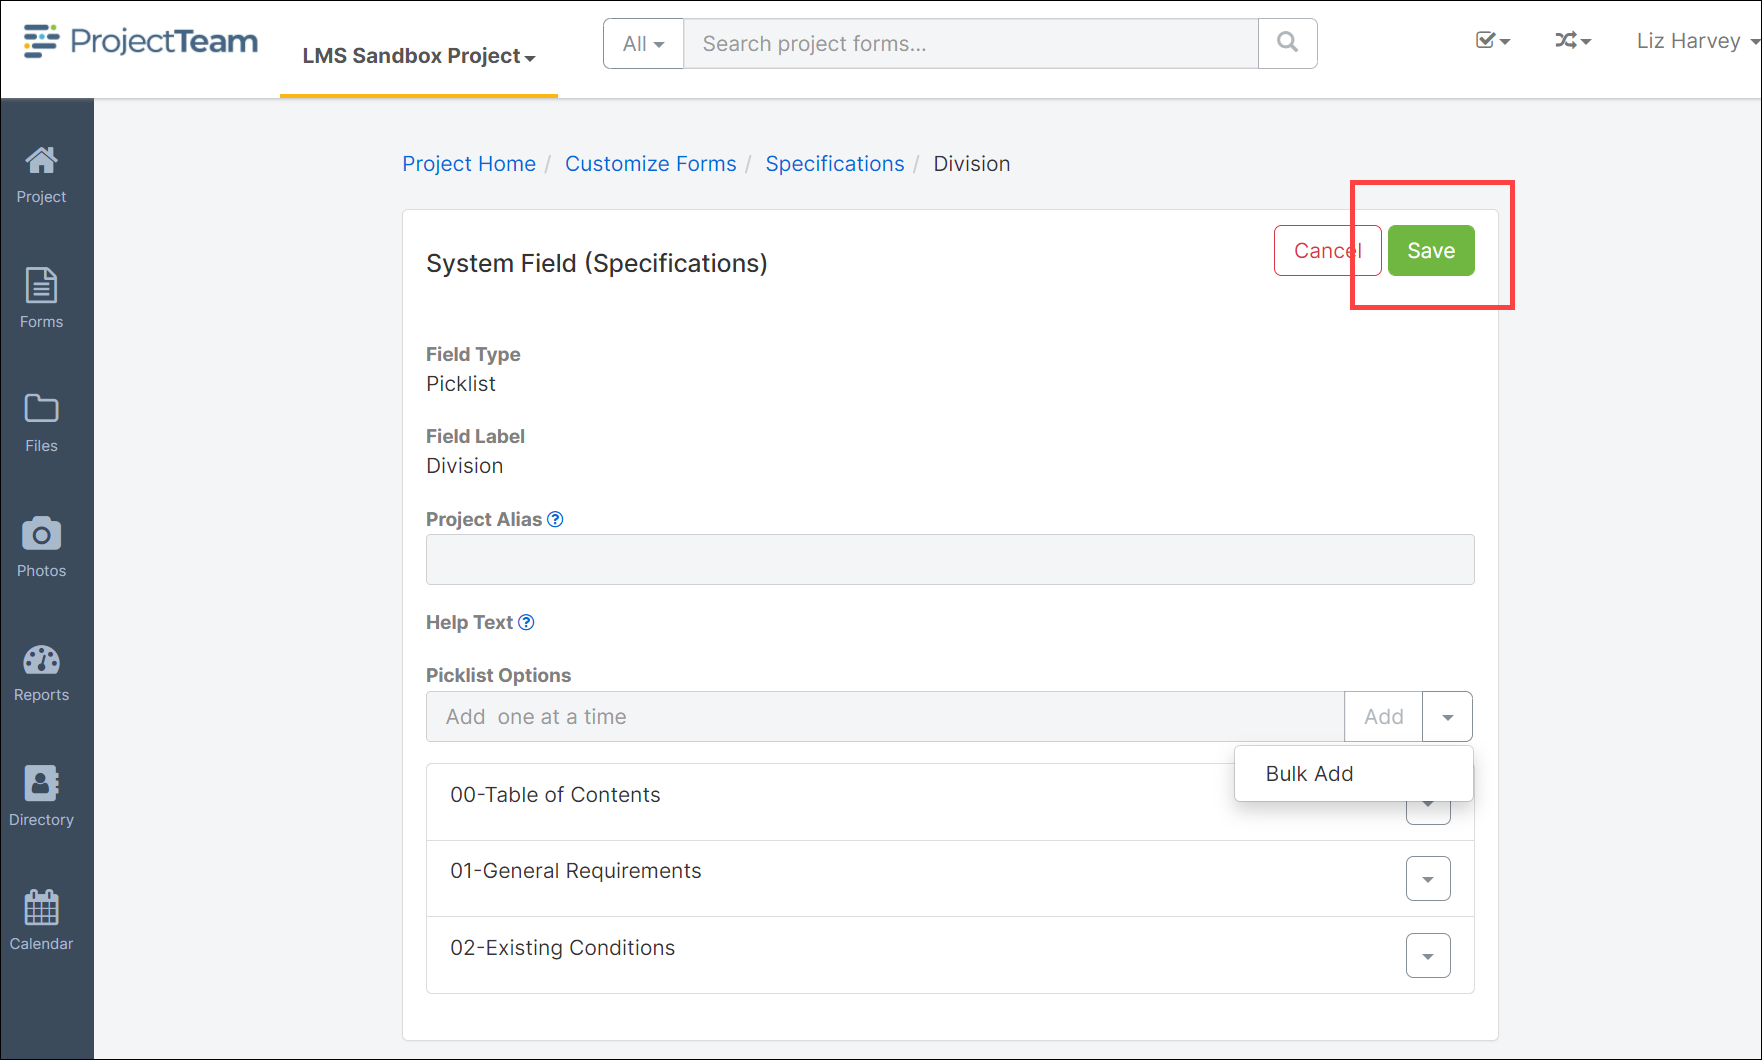
- The Division form will open.
- To manually add a Division, enter a division title and click the Add button.
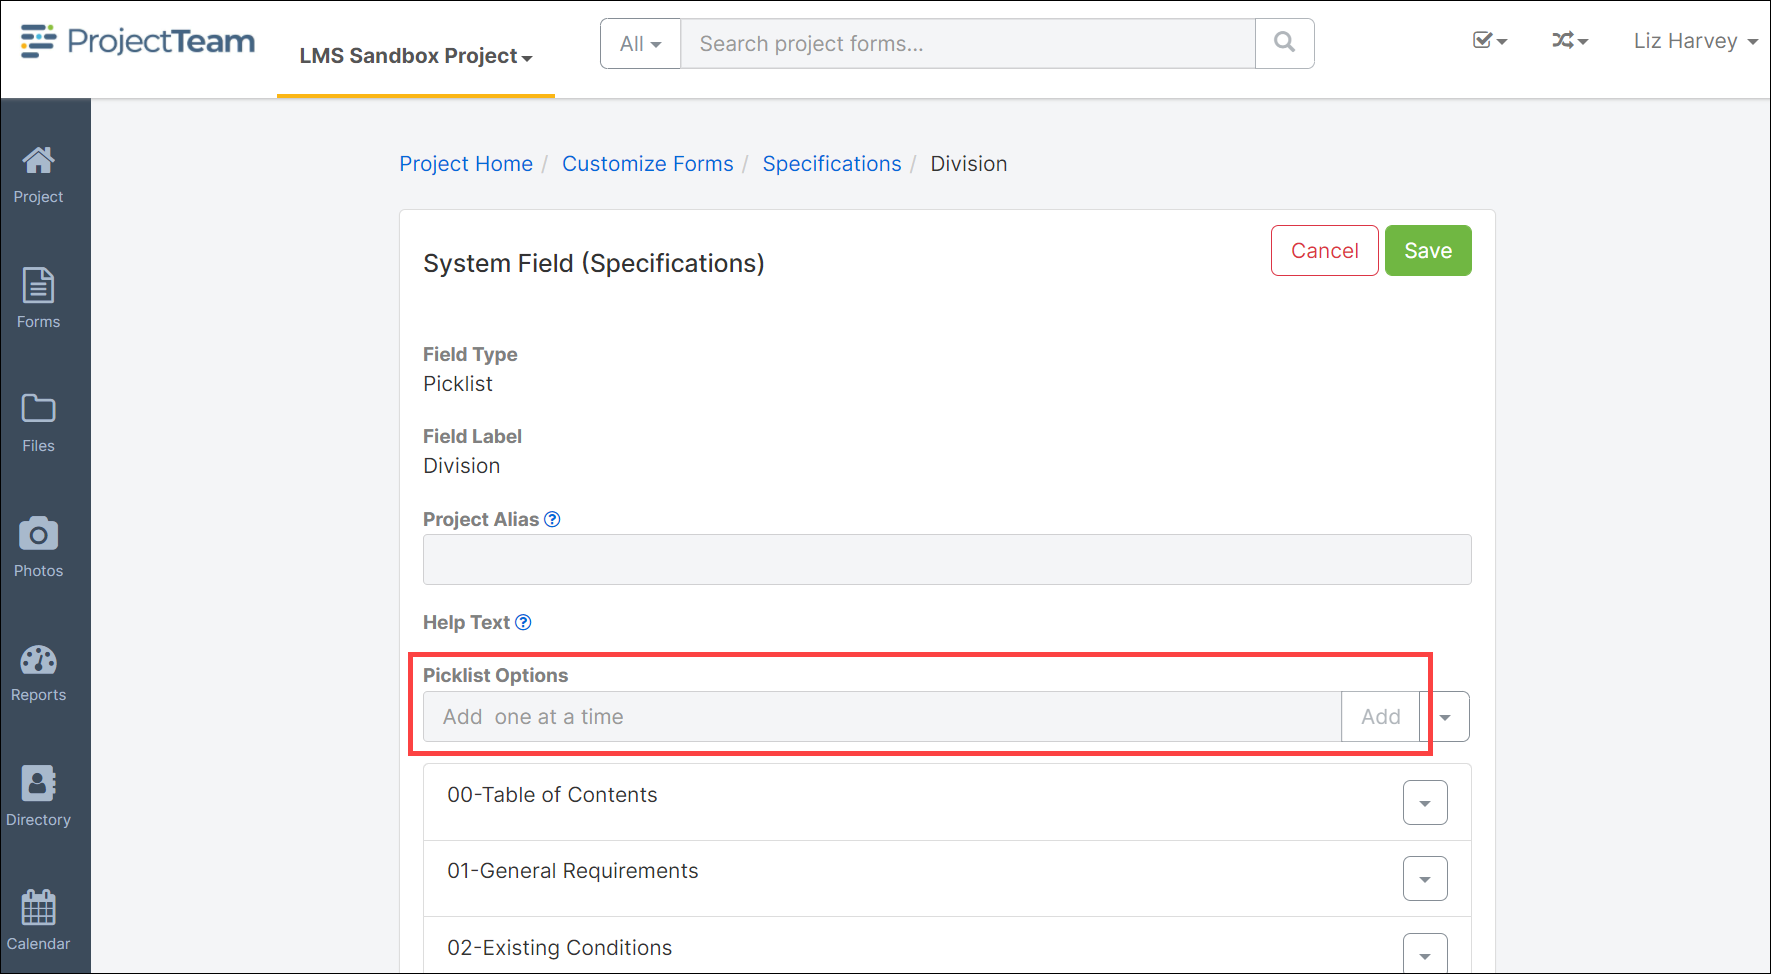
- Click the Save button.
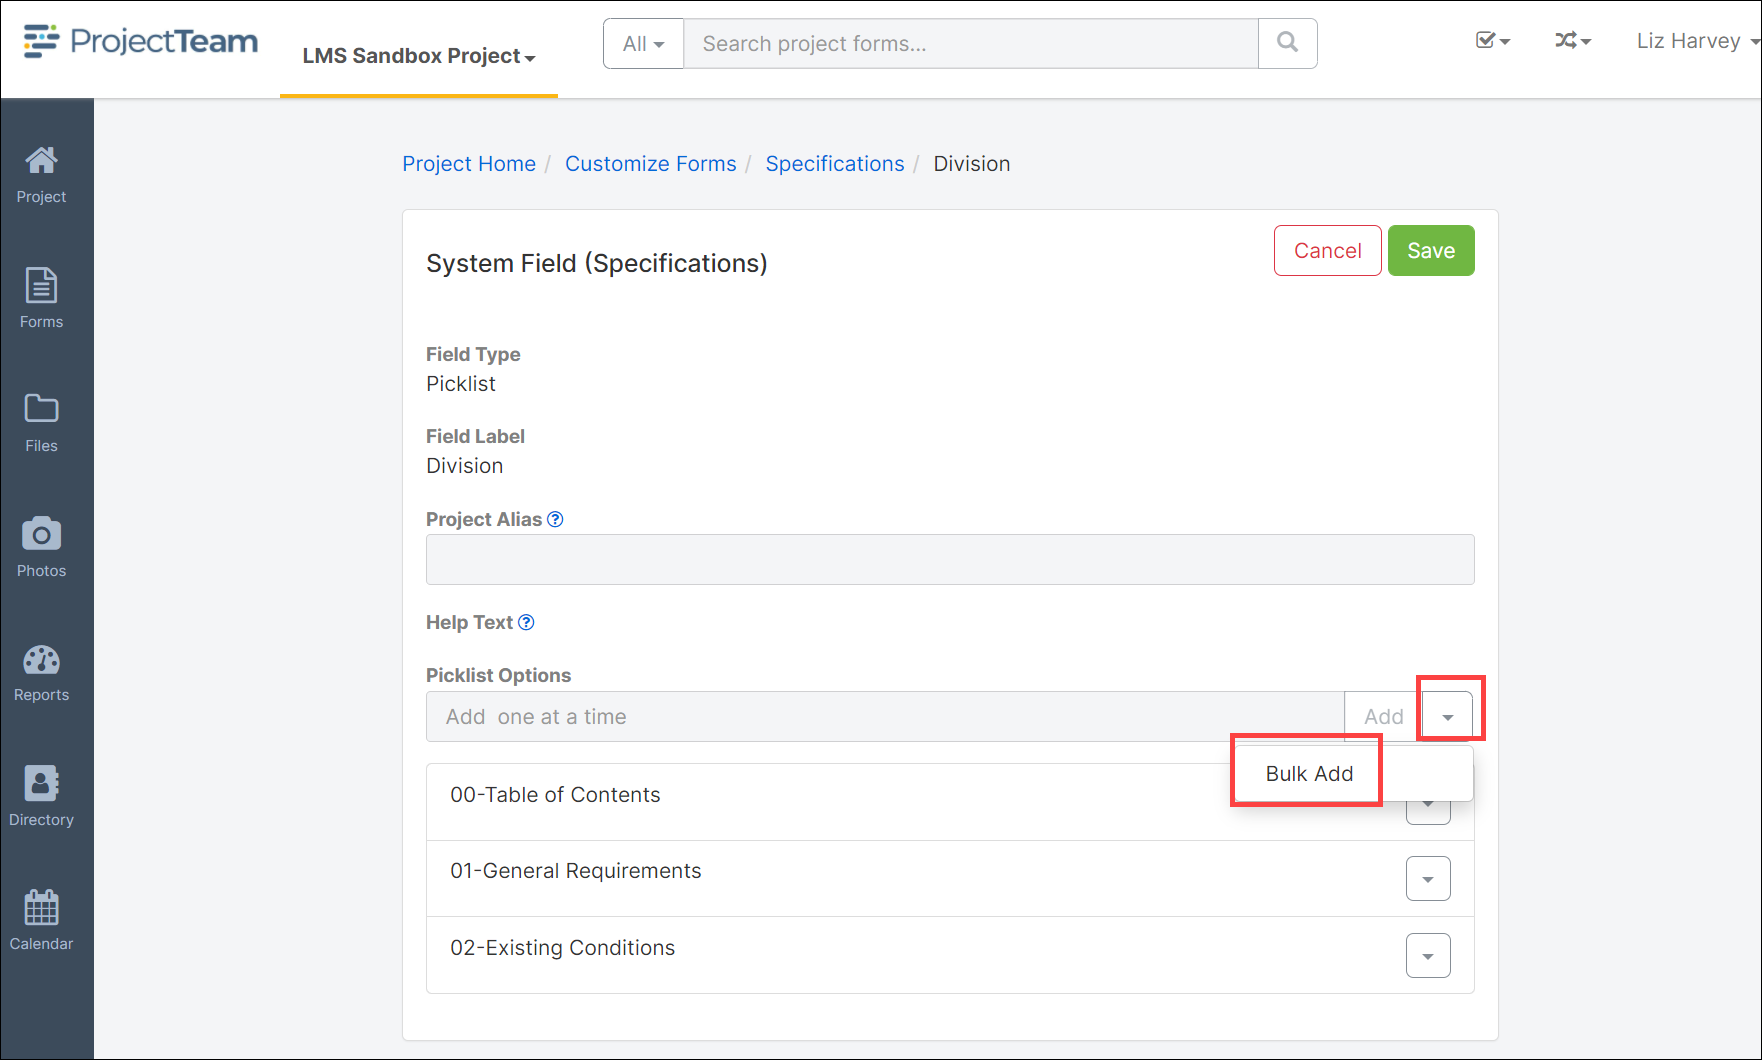
- To upload a list of Divisions, click the dropdown arrow beside the Add button and select Bulk Upload.
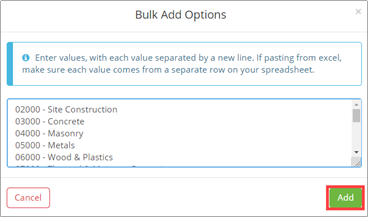
- The Bulk Add Options modal window will open.
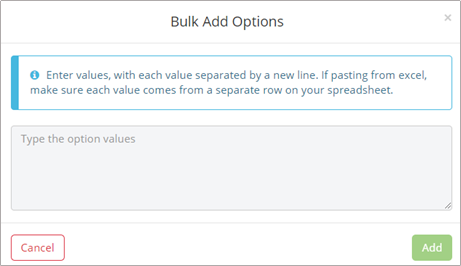
- Copy and paste a list of values into the Option Values box. If pasting from Excel, make sure each value comes from a separate row on the spreadsheet. (See an example below).
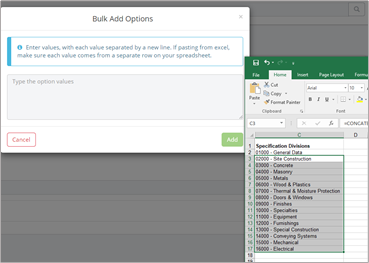
Download : 16 Division - Specifications - Division Options.csv - After adding the Divisions, click the Add button to complete the upload.
- The Field Properties page will open with a list of the newly added Divisions. Click the Save button to save the changes.
- Use the breadcrumb trail at the top of the page to return to either Customize Forms or Project Home to return to the home page.
