Create a workflow
Note: Only Project Administrators have access to configure workflows on projects.
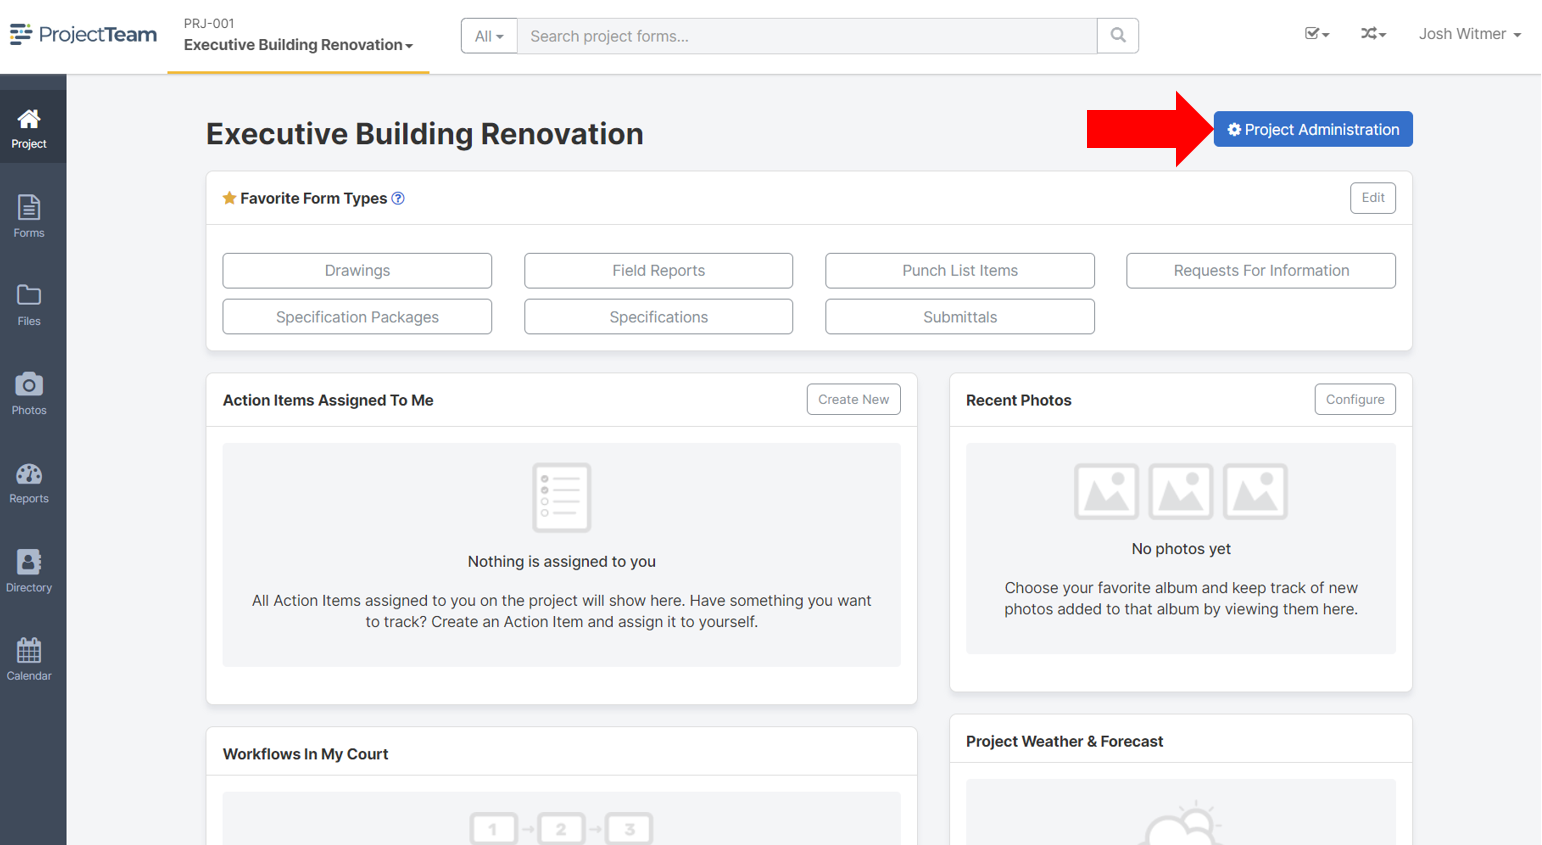
- On the project homepage inside a project, click the Project Administration button.
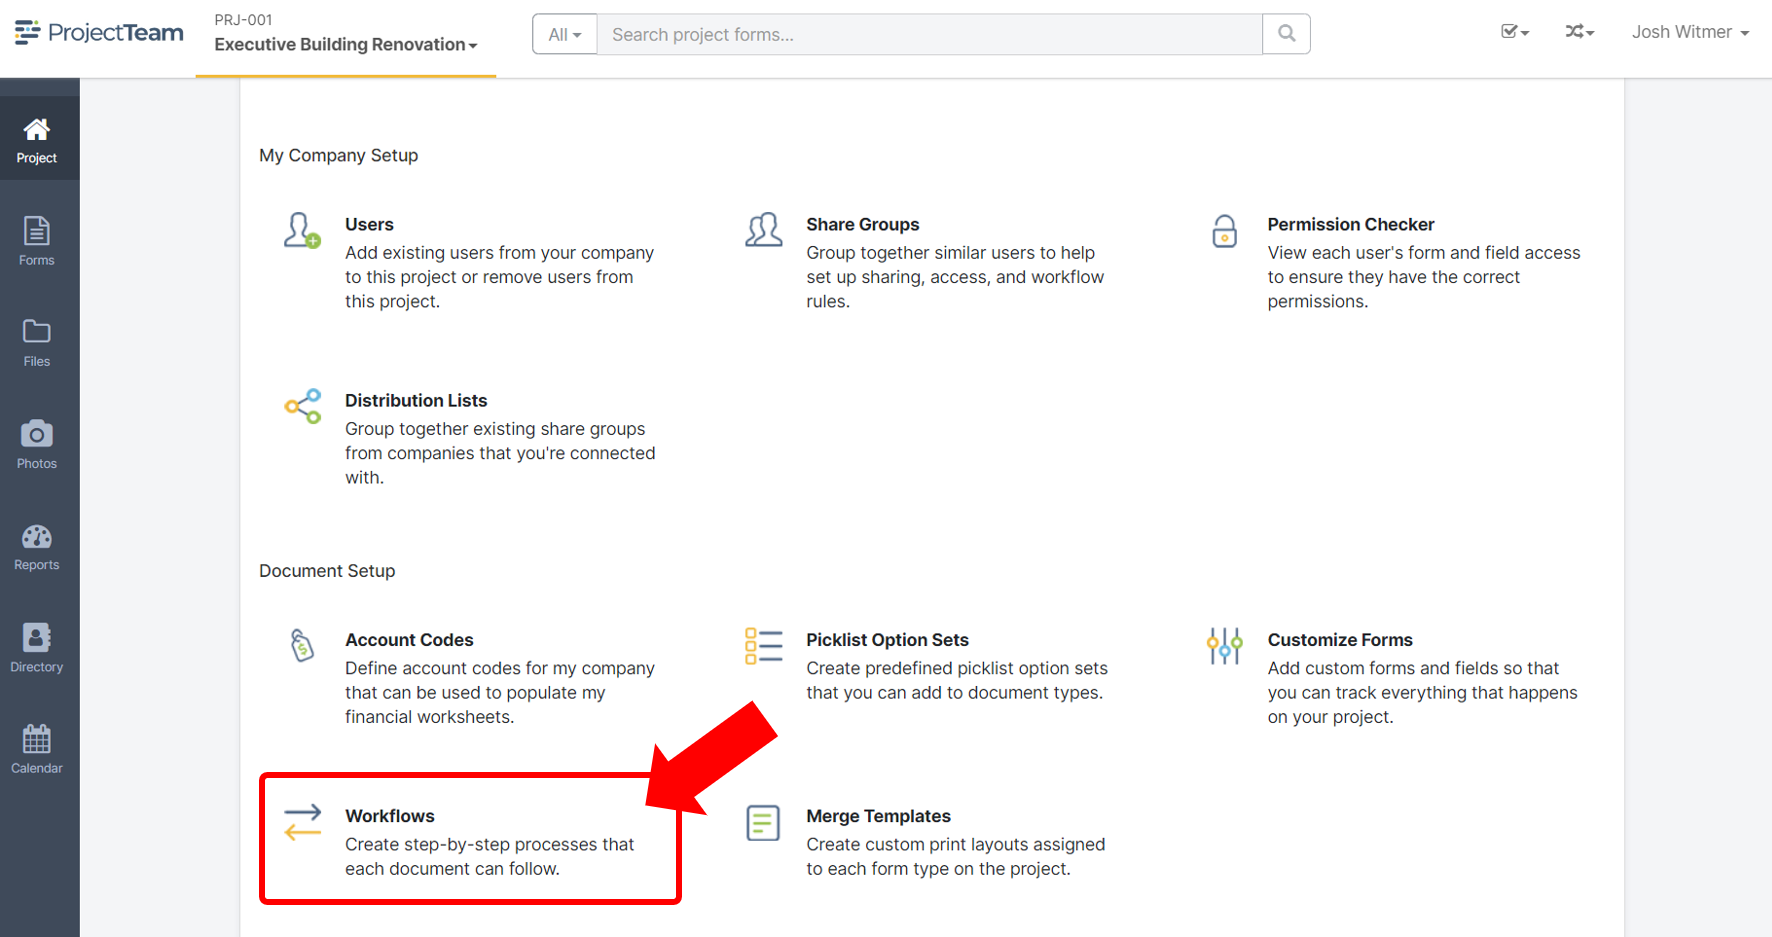
- In the Project Administration panel, scroll down to the Workflows section and click.
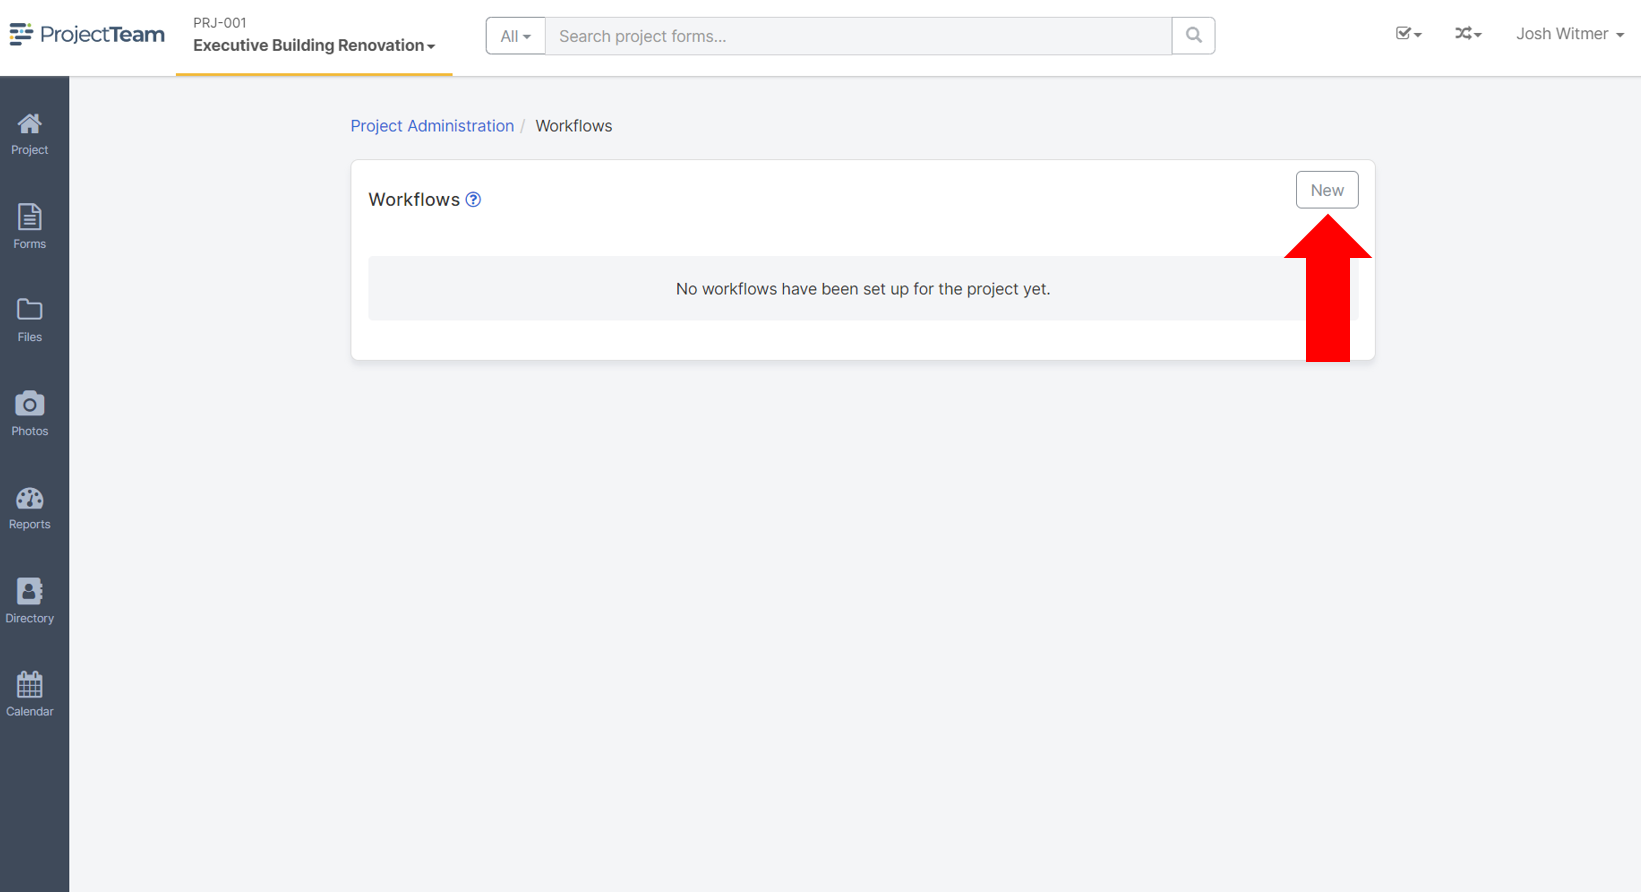
- In the list view of workflows, click the New button.
- Fill in the fields (detailed below) and click the Save button.
Understanding the workflow options and fields
When creating a new workflow, you are presented with many options which determine how users will interact with the workflow on forms. This section will provide detail on the importance of each field and how it affects your workflow.
Note: All fields of the "Workflow Details" area can be edited after saving. Therefore, if you make a mistake and need to update a field, you can do it.
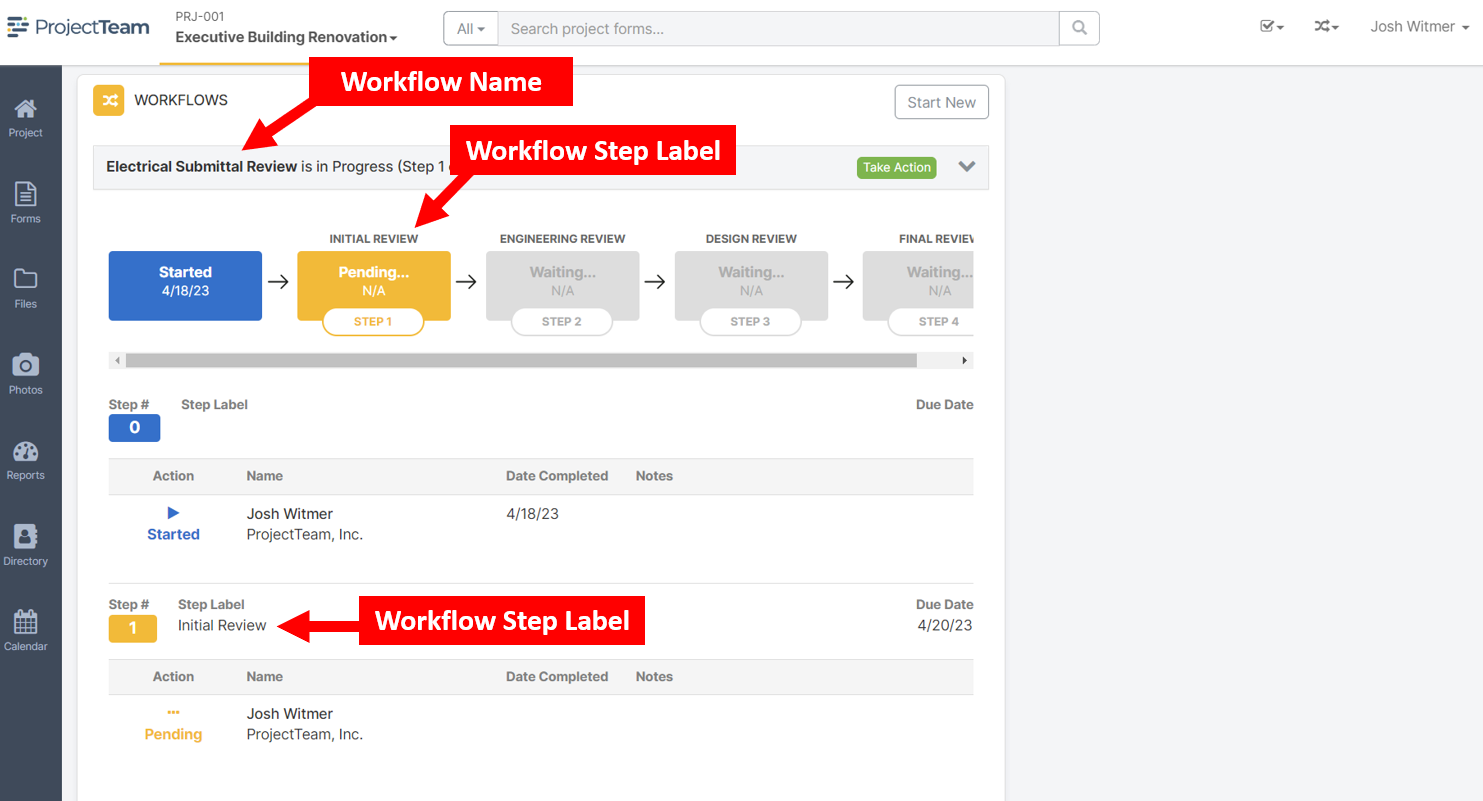
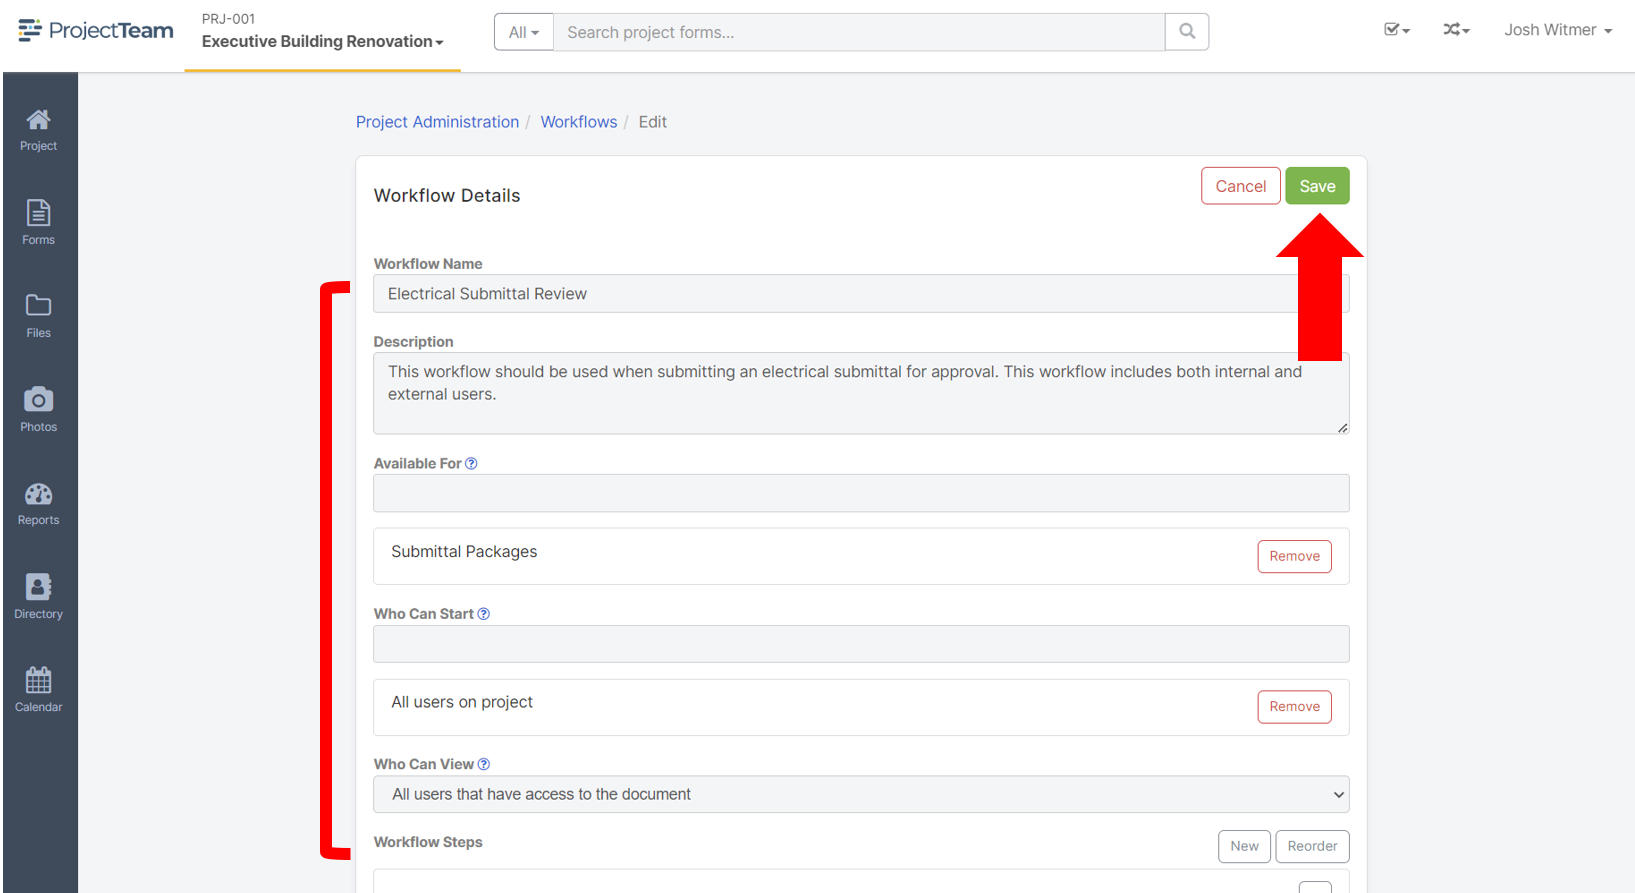
Workflow Name
This is the official name of your workflow. The workflow name will show in places where users see a list of workflows.
A good example Workflow Name is: "Electrical Submittal Review"
Workflow Description
This is a short description of your workflow which helps users understand when they should use your workflow. The Workflow Description will also show in places where users see a list of workflows.
A good example of a Workflow Description is: "This workflow should be used when submitting an electrical submittal for approval. This workflow includes both internal and external users."
Available For
This is a list of document types, such as RFIs, Submittals, Folders, etc., where you want to make the workflow available to your users. If a document type is listed, then the workflow will be available. If a document type is not listed, then the workflow will not be available.
Who Can Start
This is the list of users who can start the workflow on the document types listed in the "Available For" field. You can choose from a list of share groups and users in this field.
For example, you may say that "All users on project" should be able to start the workflow. In that case, any user on the project will be able to start the workflow on document types listed in the "Available For" field. If you don't want just any user to be able to start the workflow, select individual share groups and users to limit starter access.
Who Can View
This field determines who can view the workflow once it's been started on the document types listed in the "Available For" field. You have two options:
- Only users that are involved in the workflow - This means the users who started the workflow and users in each step of the workflow (including the Send To and Also Copy fields) can view the workflow. No others users are able to see the workflow, even if they have access to the related document.
- All users that have access to the document - This means that any user that has access to the document in which the workflow has been started can view the workflow, even if they are not directly involved in the workflow.
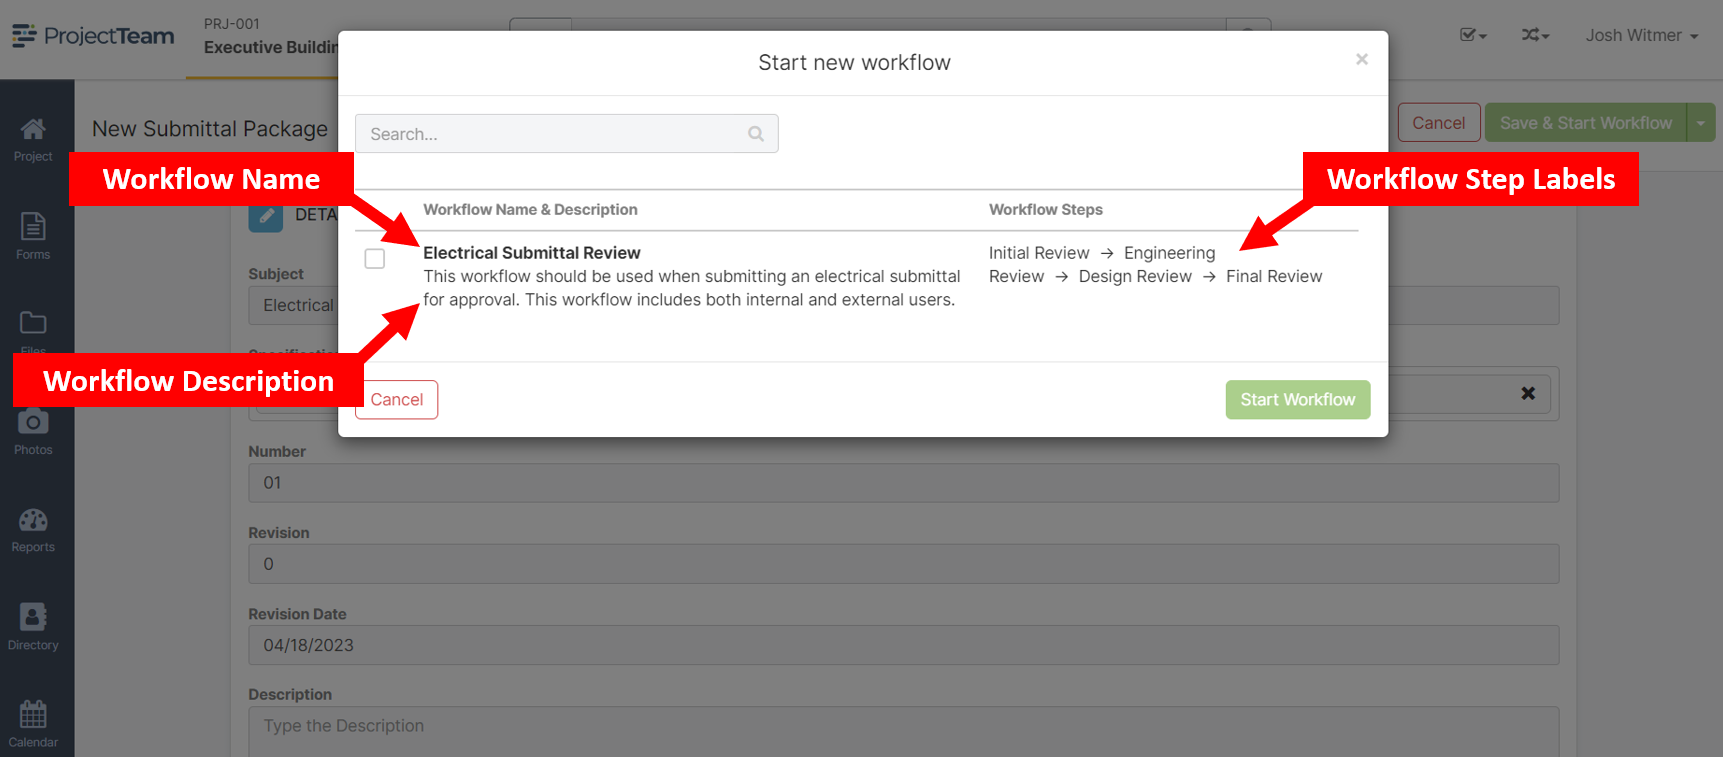
Workflow Steps - Step Label
This is the label of each step. The Step Label will be shown to users in the preview window before starting a workflow and in the workflow details area.
Workflow Steps - Send To (For Action)
This field indicates the users who are assigned the step in the workflow. These users will receive an email notification saying they have been assigned the workflow. You can add users, share groups, or even a dynamic user in this field.
- Send To = User - The user will show in the workflow history as "Pending" until they take their action. After their action, the status will replace "Pending" with either "Passed", "Failed", or "Skipped" depending on the actions of the workflow.
- Send To = Share Group - The Share Group will show in the workflow history as "Pending" until a user in the group takes action. After their action, the status will replace "Pending" with either "Passed", "Failed", or "Skipped" and the Share Group name will be replaced by the actual user that took action.
- Send To = User who started the workflow - This is a dynamic option that is dependent on the individual user who started the workflow. For example, if Bob Jones started the workflow and "User who started the workflow" is added to step 3, then Bob Jones will show in step 3.
Workflow Steps - Who Must Take Action
This field gives you the option to decide who at each step, from the list defined in the Send To (For Action) field, is required to take their action before the workflow passes to the next step. You have two options:
- Any - If the workflow Send To (For Action) field has 3 users in it, ANY of those users can take action to pass the workflow to the next step. Once one of the users takes their action, the action next to their name will show "Passed" while the status next to the other users' names will show "Skipped".
- All - If the workflow Send To (For Action) field has 3 users in it, ALL of those users must take action to pass the workflow to the next step. If one user takes their action, the workflow will remain at that step until the other users take their action as well. There is no skipping in the "All" case.
Workflow Steps - Days To Take Action
This field indicates the number of days the users at the step have to take action. The number of days is based on "Working Days" which can be defined in the project calendar. For example, if you put a "1" in the field, and Saturday and Sunday are non-working days, then a workflow that gets assigned to a user on Friday will be due on Monday.
Workflow Steps - With Instructions
This field is where you can add instructions that will be sent to users once they are assigned the workflow, both in an email notification and shown in the workflow banner on documents.
Workflow Steps - Also Copy (For Information)
This field provides a way to auto-share the document on which the workflow has been started. Users and Share Groups added to this field will not receive email notifications. However, they will be able to view the workflow on the related document.
Screenshots of workflow in use
This section is intended to give you context to what workflows look like on forms, to help you better understand where fields defined in the administration area show to users.
Screenshot of the window where users select the workflow they want to start
Screenshot of a workflow banner on a document for a workflow in your court
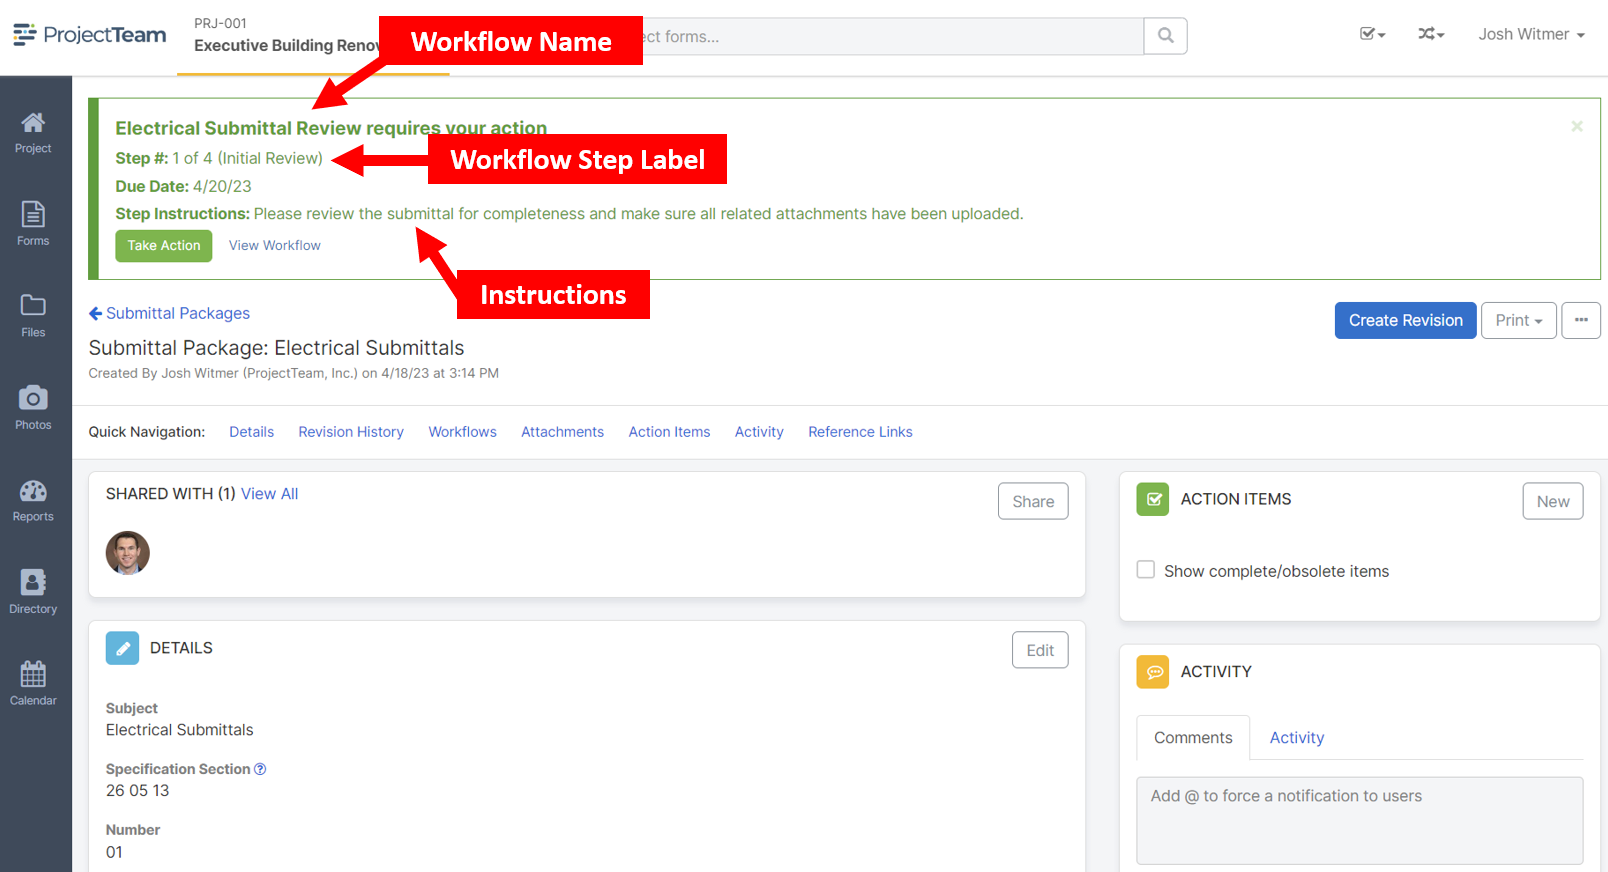
Screenshot of the workflow panel on a document