Add row numbers to a table in a Merge Template
Add row numbers to any table in a Merge Template even if the collection in ProjectTeam.com doesn't show row numbers.
When configuring a custom collection field in ProjectTeam.com, the system will give you the appropriate merge tag to include in your merge template to show that row # in your output. However, there are instances where you may need to create your own custom row #. This article shows how to create that custom row # using smarty tags.
Step-by-Step Example
Note: This page assumes you have a basic understanding of creating merge templates. If not, first visit the Create a Merge Template page.
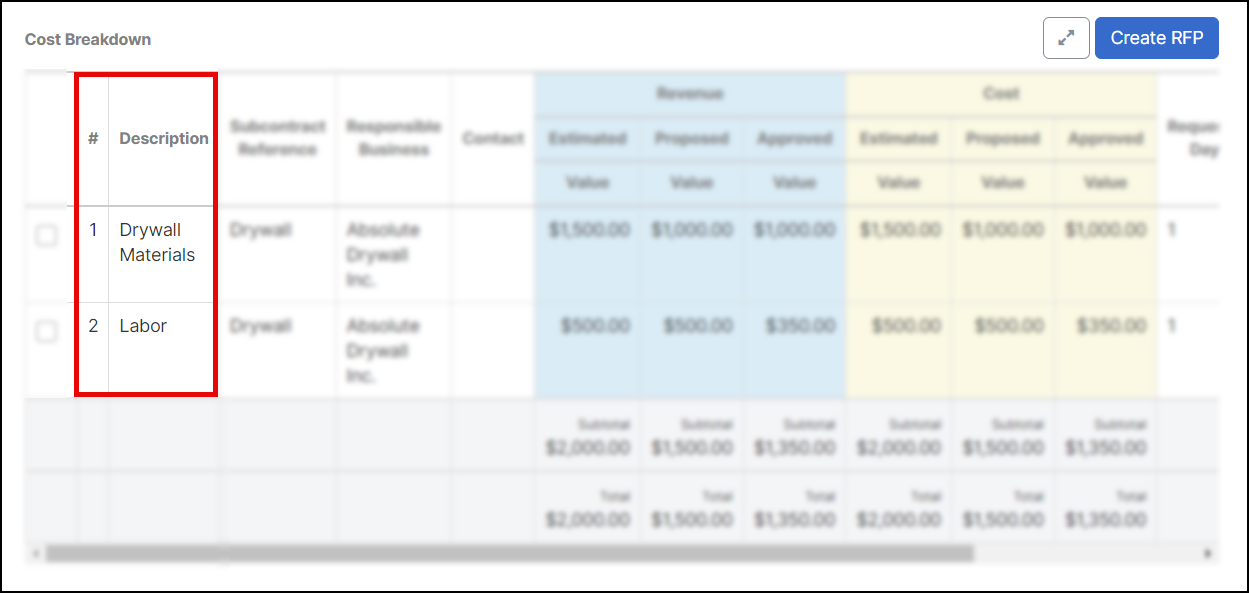
For the example below, we will use the Potential Change Order form. In the PCO form, there is a collection called Cost Breakdown that you can include in your merge template. Let's say based on the fields you have on your PCO form, you are looking to include just two columns in your merge template. Those include Row # and Work Description.
You're ready to start building your merge template that shows this data. Using the merge tags provided by the system during the merge setup wizard, copy and paste the tags to your table in MS word. Remember to add the necessary tags to the first and last columns to signify repeating rows.
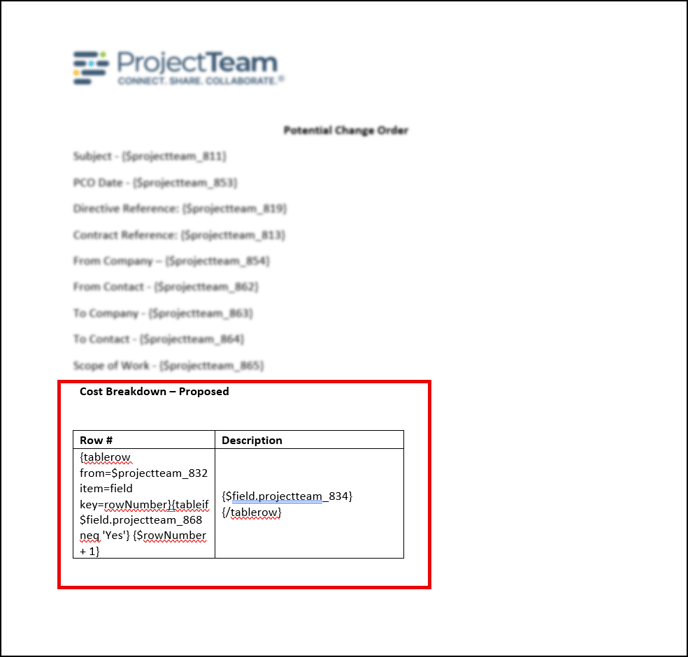
So far, we've added the starter tag to row 2, column 1, and added the field tag and the ending tag to row 2, column 2. Next, we need to add the tags that will allow us to get a custom row # in row 2, column 1.
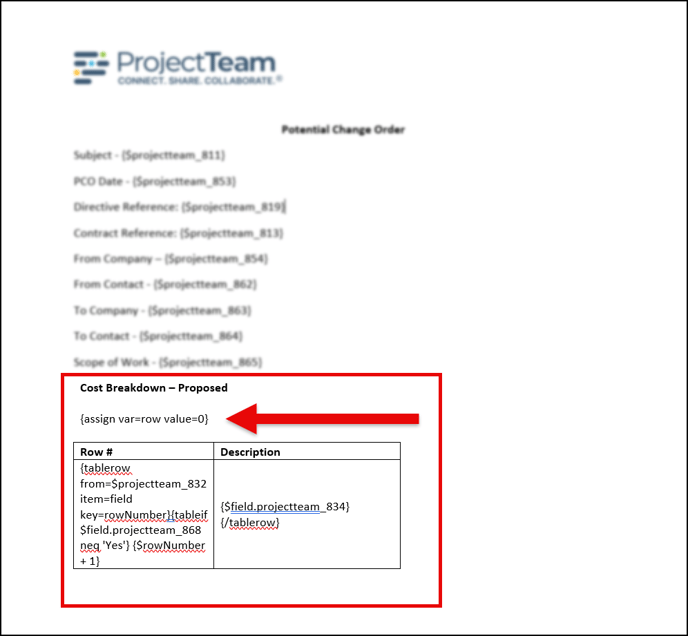
First, you need to initialize a new variable. So let's put that at the top, outside of the collection.
-
Copy: {assign var=row value=0}
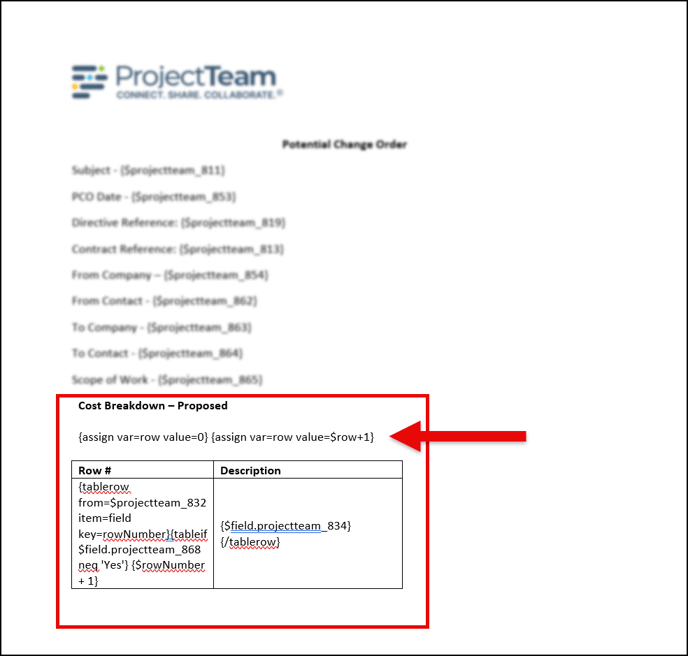
Next, we need to add simple math inside row 2, column 1 to perform math.
-
Copy: {assign var=row value=$row+1}
And finally, we just need to show the output of the variable we have defined.
-
Copy: {$row}
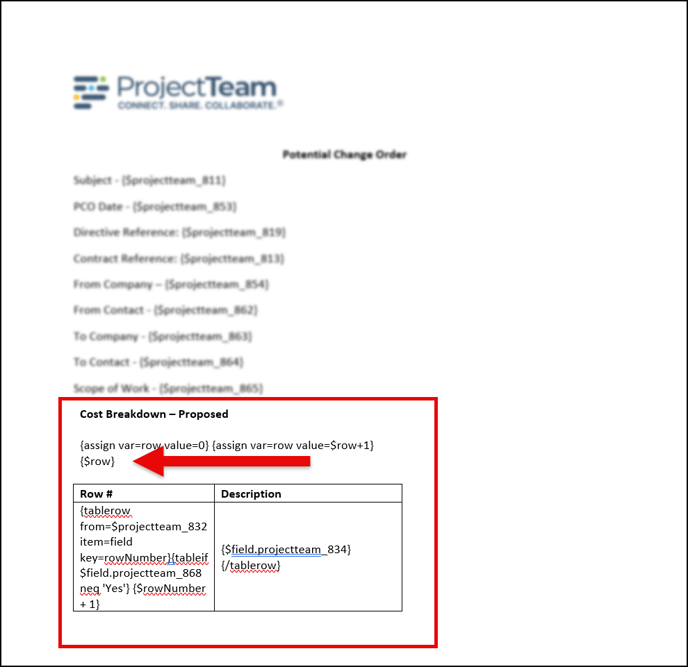
If you were to run this now and see all the calculations take place, it would look something like this:
- Start: row=0
- Row 1: row=0+1=1, therefore row=1
- Row 2: row=1+1=2, therefore row=2
- Row 3: row=2+1=3, therefore row=3
- Stop: no more rows