You can add photos to any album that you have access to, even if you are not the creator of the album. All users that have access to the album will be able to see photos included in the album. Inside an album, you can add photos in two main ways:
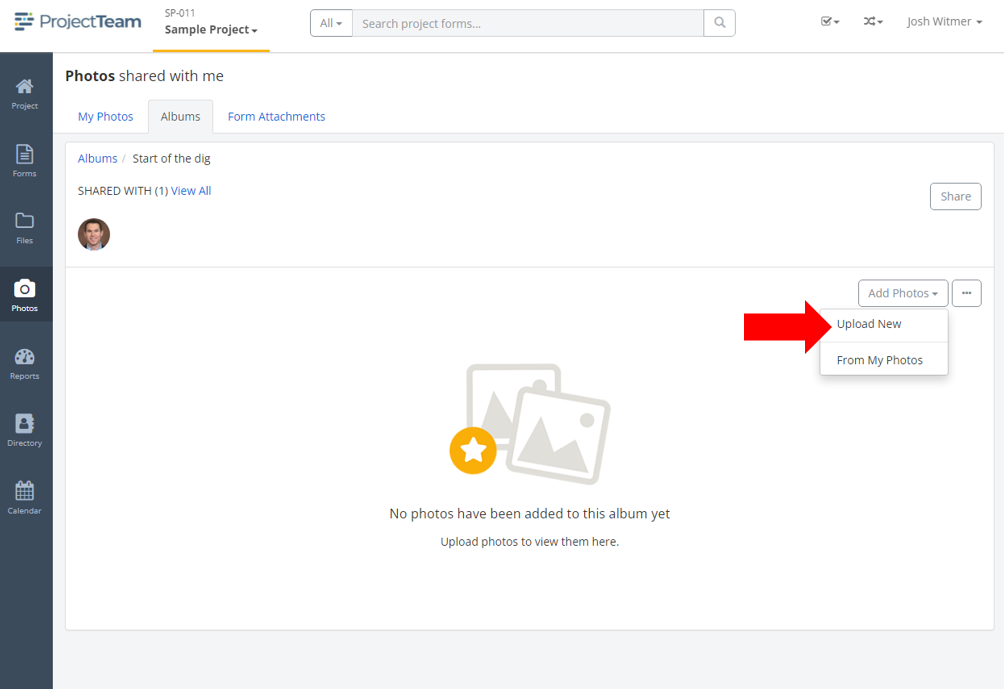
Upload new photos to the album
- Inside of a project, click the Photos option in the secondary navigation.
- By default, you are viewing the My Photos tab. Click the Albums tab.
- Click the album you want to add photos to.
- Near the top of the album, click the Add Photos button and choose the Upload New option.
- Browse and select photos from your computer. (Note: Accepted file types for photos include: .jpg, .jpeg, and .png)
- Click Open.
- Uploaded photos will show in the album timeline view.
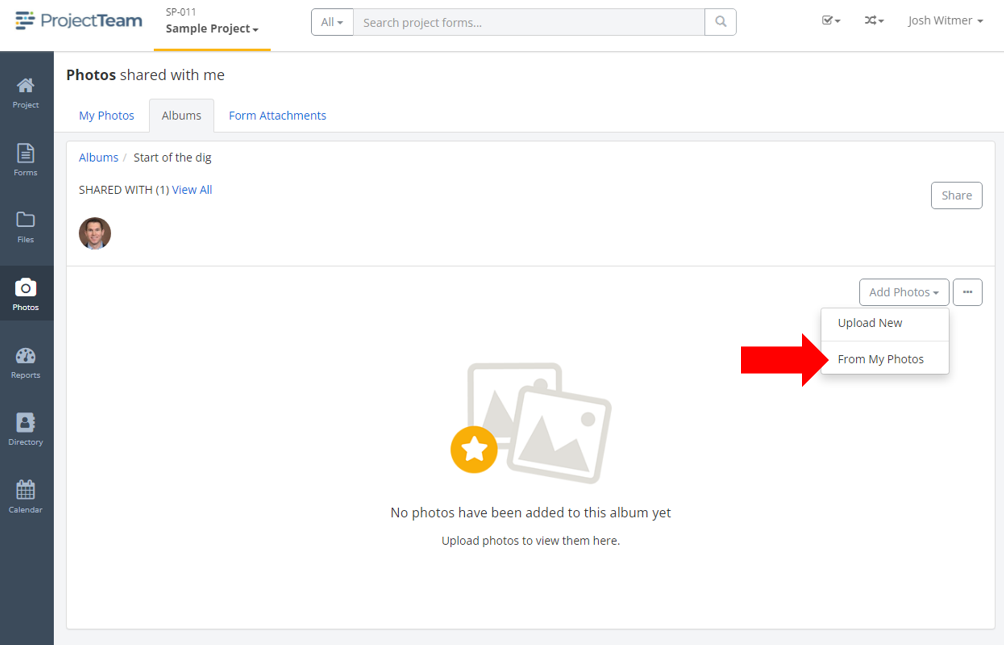
Add photos from your My Photos area to the album
- Inside of a project, click the Photos option in the secondary navigation.
- By default, you are viewing the My Photos tab. Click the Albums tab.
- Click the album you want to add photos to.
- Near the top of the album, click the Add Photos button and choose the From My Photos option.
- A fullscreen modal window appears showing all photos in your My Photos tab.
- Search and find the photos you want to include in your album.
- Check the box on each photo to select it. You will notice the main title on top of the window updates with the total number of photos selected.
- Click the Save button to close the modal window and add your photos.