- As a Project Administrator, navigate to the Project Homepage.
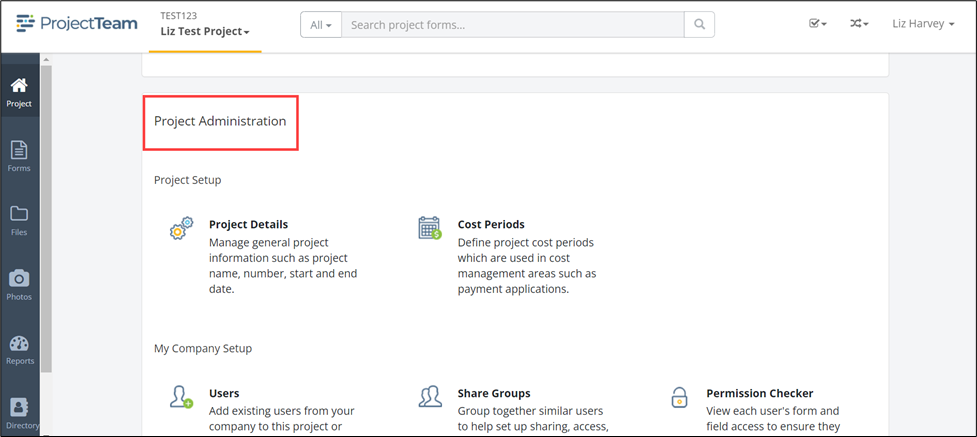
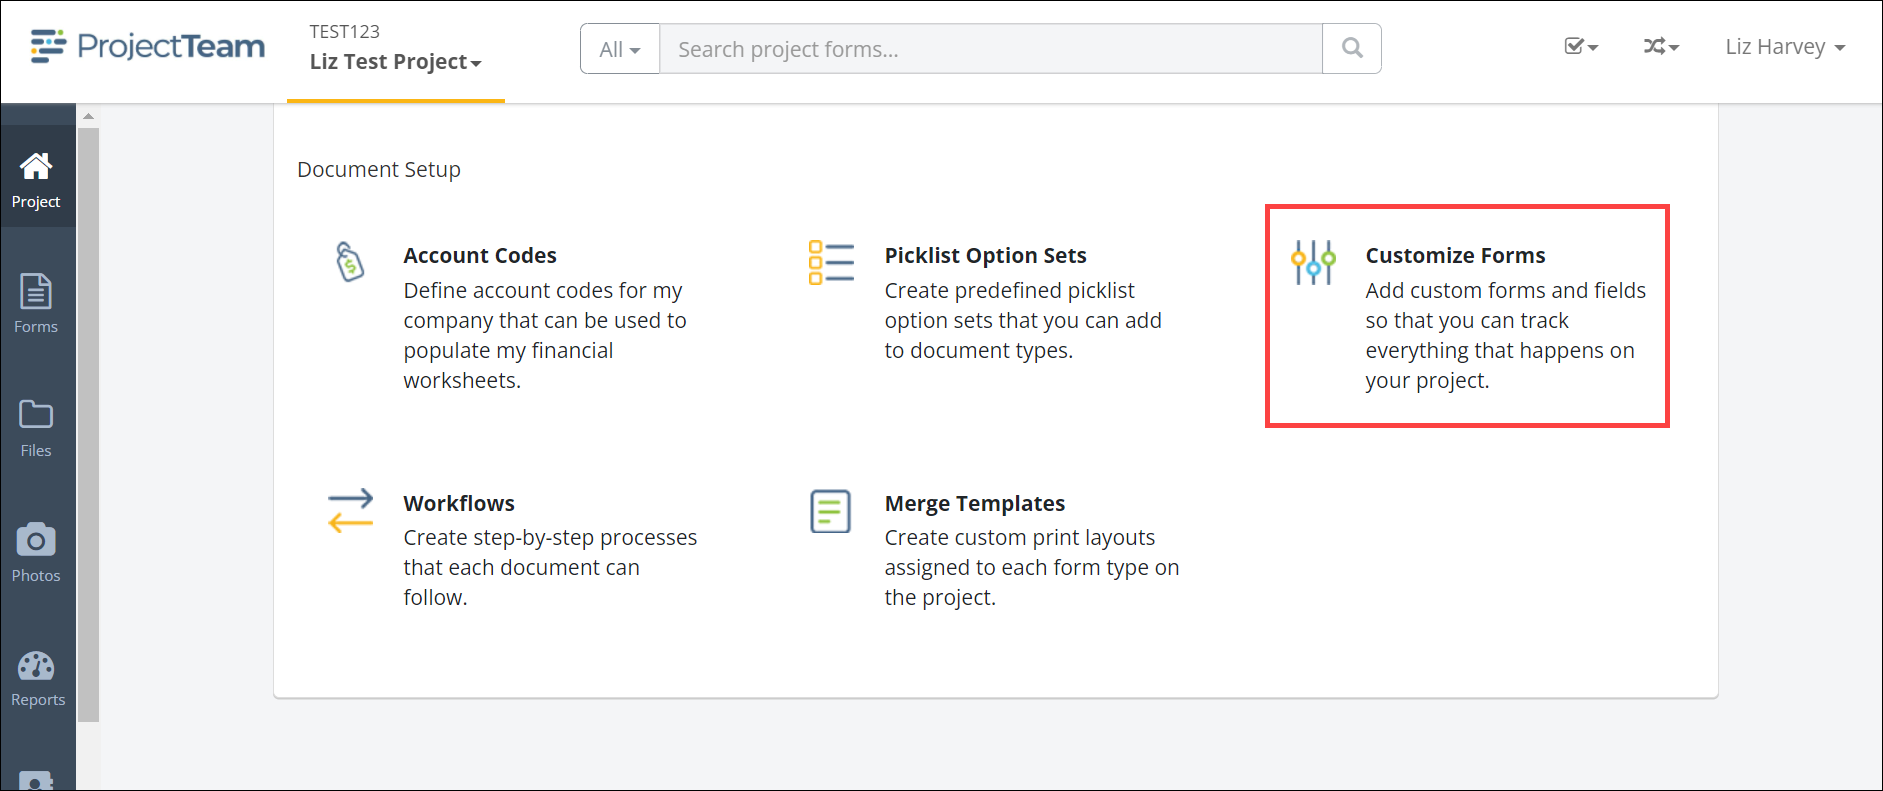
- Scroll down to the Project Administration pane under Document Setup and click the Customize Forms icon:
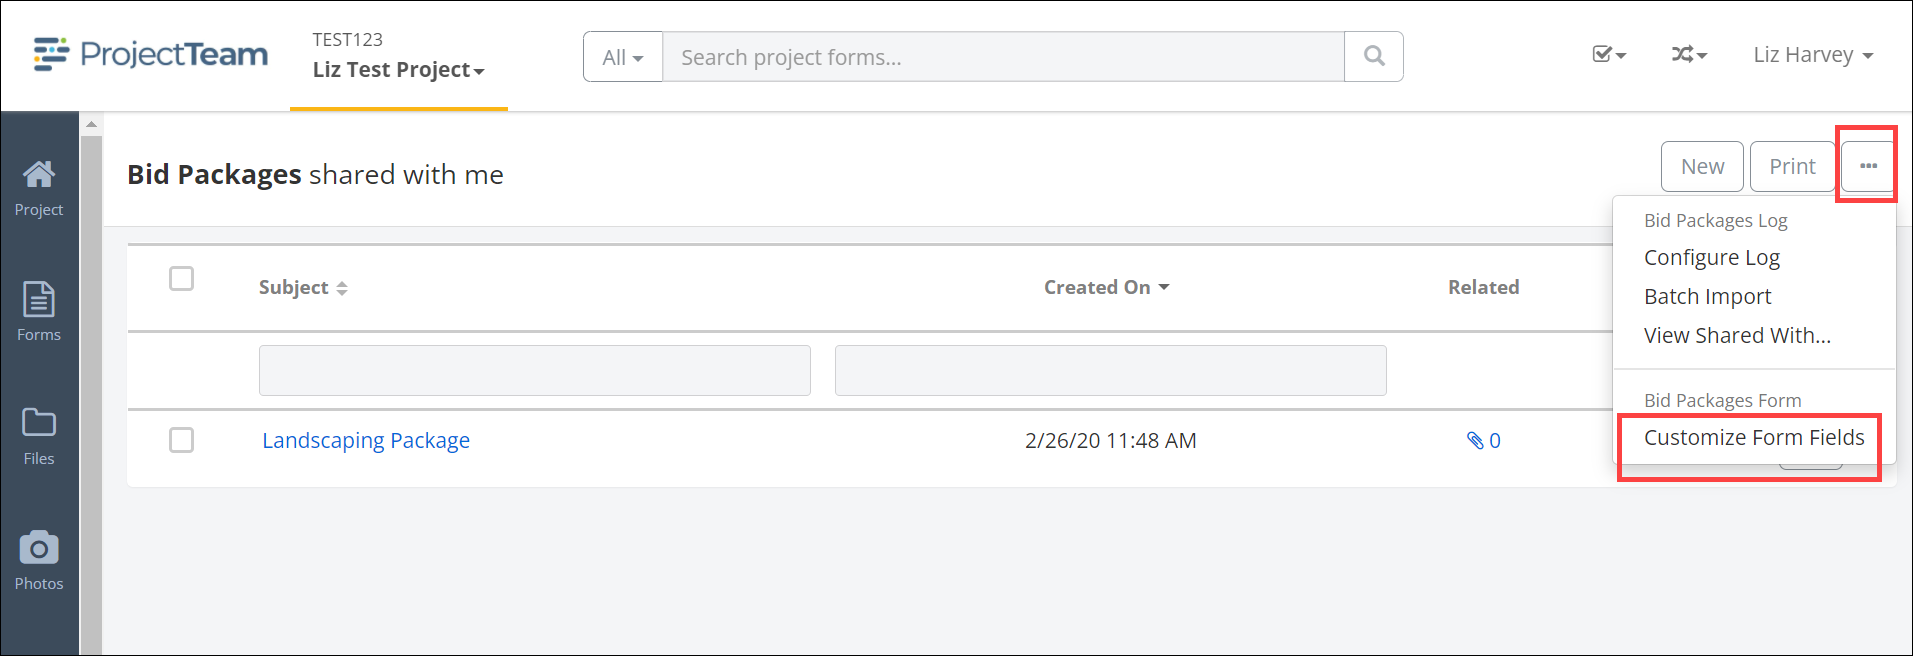
- Customize Form Fields can also be accessed using the … button from any form log view or form view and selecting Customize Form Fields from the menu.
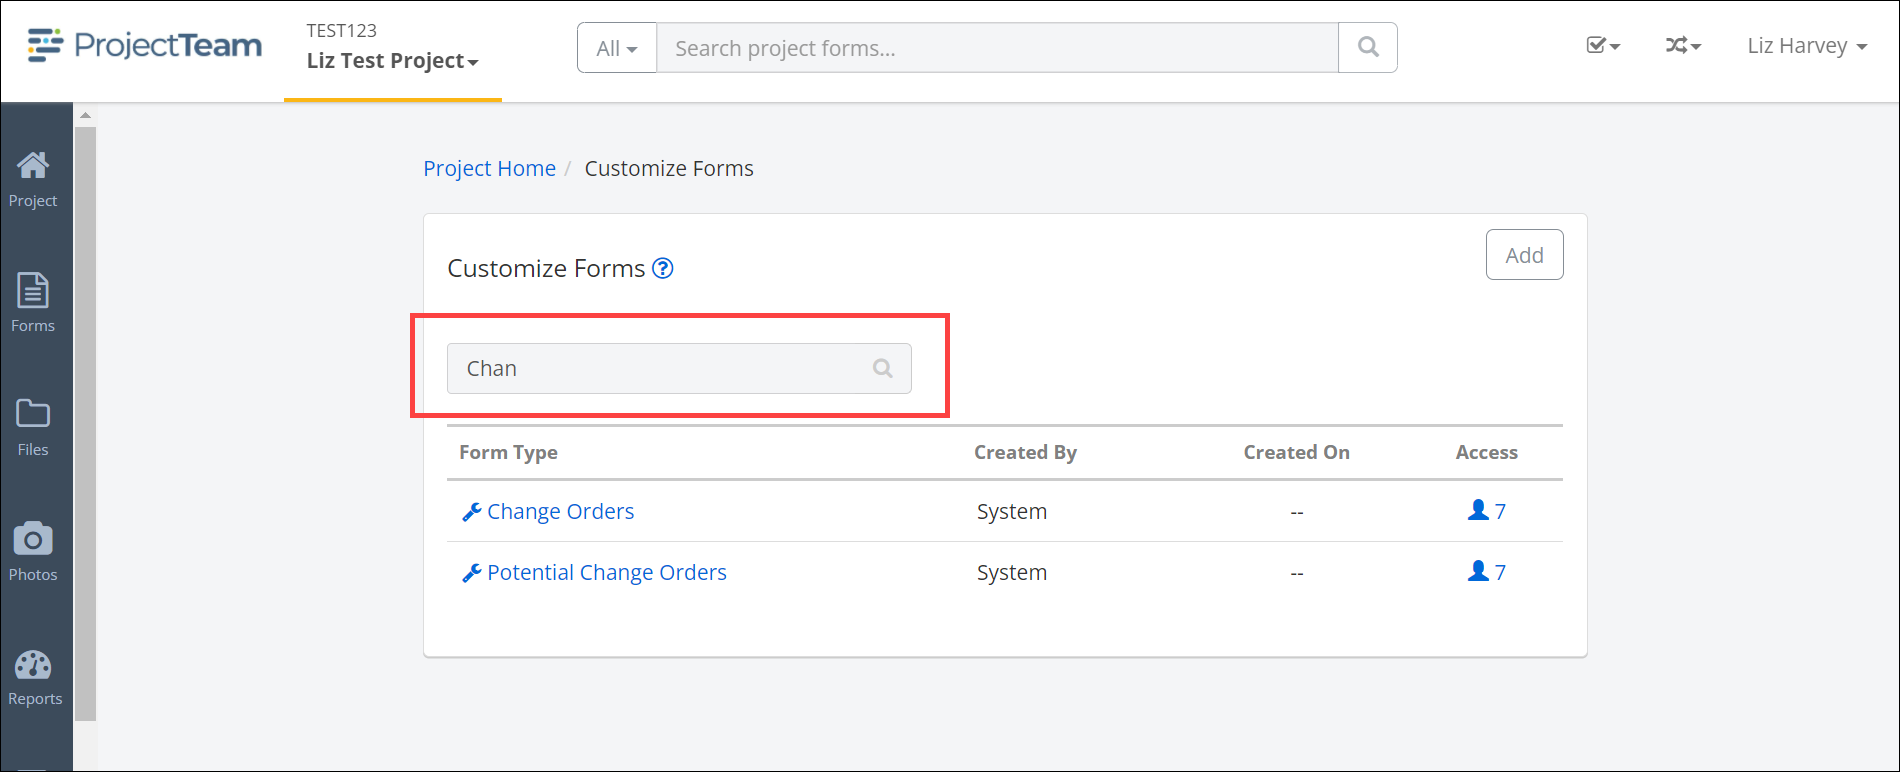
- The Customize Forms page will open. Select the Form Type that is to be updated with custom fields by clicking on the Form Type Name link or use the Search box to locate the Form Type Name.
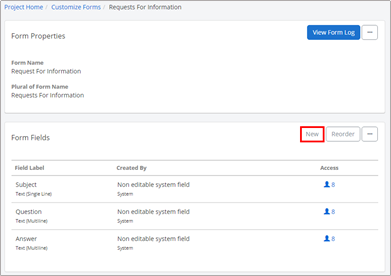
- The Form Properties and Form Fields panes open for the selected form. All existing fields for the form will be displayed. Click the New button on the Form Fields pane to add an additional field to the form.
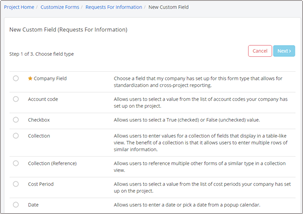
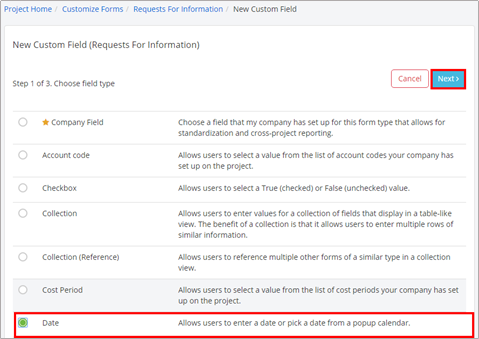
- The New Custom Fields (Form Type Name) pane will open. This is where users will select the Field Type to add to the form.
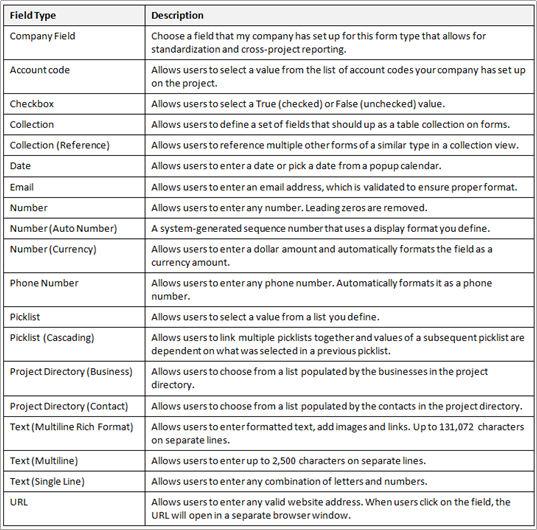
- Listed below is the current Field Types available along with a brief Description of each.
- Select the Field Type by clicking the radio button located to the left of the field name. Click the Next button.
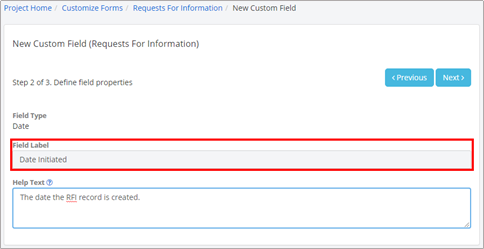
- Enter the Field Label (the name to be displayed on the form) and enter the Help Text if applicable. Click the Next button.
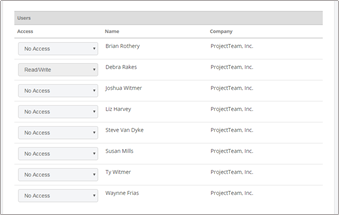
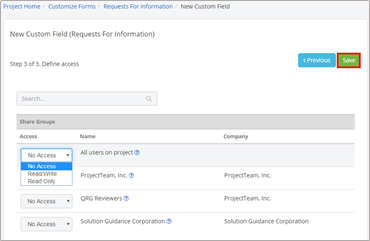
- In this step field Access to the field will be defined. There are 3 levels of access, No Access, Read/Write or Read Only. By default, the user creating the custom field will be granted Read/Write Access. Access can be defined for a Share Group and/or User. If the same user receives different access levels because they are in multiple share groups, there True Access will be the most permissive of those assigned. For example, if a user is included in a share group with access defined as Read/Write, the share group will take precedence over the user level of No Access.
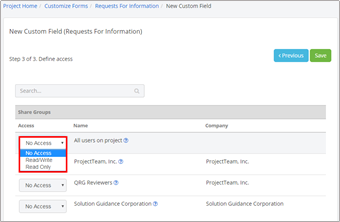
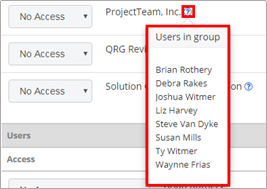
- To review the users in a Share Group click the ? to the right of the Share Group name.
- Select the appropriate Access for Share Groups or individual Users and click Save at the top of the window to save the custom field.
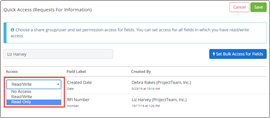
- Alternately, you can easily provide field access to a company, group of people, or multiple users at once. Click on Quick Access.
- Type the person’s name in the Share Group’s Name field.
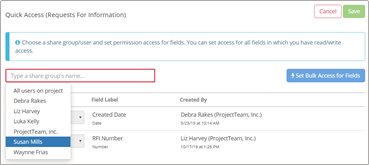
- For each field label in the Access dropdown, select one of the following: Read/Write, Read Only, or No Access.
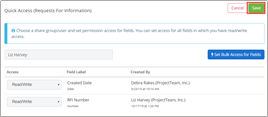
- Click Save after you have made your access selections for each field.
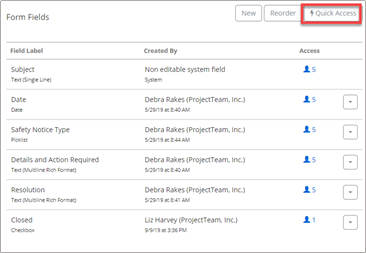
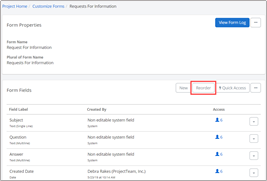
- You can reorder the system and custom fields that you have added to your form. Click Reorder.
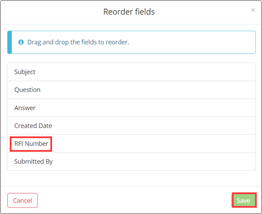
- Select a system field or custom field, such as Subject or RFI Number, drag and drop to new order location. Click Save.
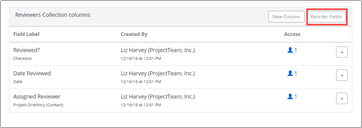
- Form within a Collection, you can also Reorder the Fields. Within a form that has a collection, click on Reorder Fields.
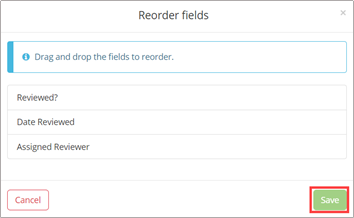
- The Reorder fields modal will open, drag and drop the column(s) to reorder. Click Save.
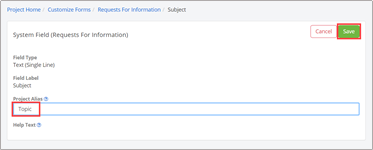
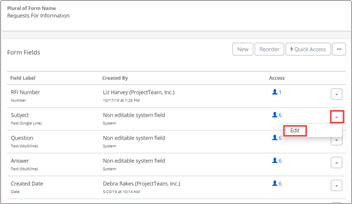
- To change a system field name, click on the arrow dropdown to the right of the field label and select Edit.
- The system field will appear. Type in the new name in the Project Alias Click Save.